My friend Rochelle recently brought over these amazing confections. Chocolate + peanut butter + rice krispies = Uh. May. Zing. They are easy to make and would be a great project to do with kids! So naturally I had to share with you too.
Warning: these are insanely addicting...you will be eating them...a lot.
Peanut Butter Balls
1/4 lb butter or margarine
1 (16 oz) jar peanut butter (chuncky or creamy is fine)
1 lb powdered sugar
3.5 cups Rice Krispies
1 large Hershey bar
1 (6 oz) package semi-sweet chocolate chips
wax paper
Using a handheld electric mixer or standing mixer, beat the butter and peanut butter together until combined and creamy. Add powdered sugar and beat on low until combined. Add Rice Krispies and mix to combine.
Using a spoon or melon-baller, scoop out a small amount and roll dough into a ball about 1 inch thick in diameter. Set balls aside.
Set up a double-boiler. Melt the chocolates together until combined. You can use water, a little butter or a dash of heavy cream to thin out the chocolate if needed. Using a toothpick, dip each ball into the melted chocolate and set on a baking sheet lined with wax paper to cool and harden. To speed up the process you cand place the dipped balls into the refrigerator. When the chocolate has set, they are ready to serve.
Notes:
You can use creamy or chunky peanut butter.
You can do a combination of milk and semi-sweet chocolate, all milk chocolate, all semi-sweet or even dark or white chocolate. You can always add more chips during the melting process. You can also melt chcocolate in the microwave.
You can make ahead and freeze the balls.
Balls can stand out at room temperature for a couple of hours but need to be refrigerated eventually as the chocolate will get too soft.
For a cute presentation, stick a white lollipop stick in the balls before dipping them into the chocolate and arrange them on a nice platter as little "pops."

Everything You Wanted To Know (or Not) About: Asparagus
Monday, March 29, 2010
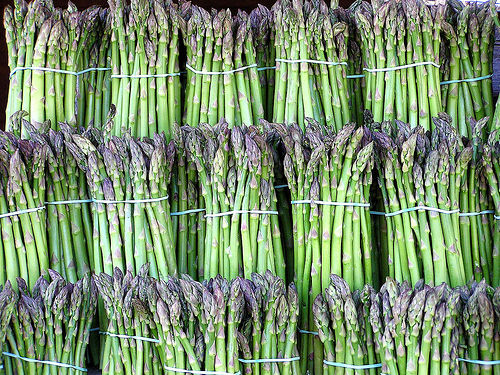 |
| [photo from elements4health.com] |
Definitely one of my top 3 favorite vegetables, asparagus is now coming into the height of its season as we step into the full glory of spring.
Asparagus comes from a plant of the lily family, and the spears we all know and love are actually the spears that grow from a crown that's planted in mid-winter that shoots up in spring. The first spears in spring are characteristically thinner and longer, and as the season progresses into summer the spears become thicker and meatier.
Asparagus is one of those "ancient" vegetables. In fact the very name "asparagus" probably comes from the Greek aspharagos, meaning "sprout" or "shoot." It's mentioned in Apicius's De re coquinaria, the first comprehensive cookbook written by Romans in the 5th century AD. It was widely cultivated by the Romans, Greeks and even Egyptians, and although experiencing a period of inactivity during the Middle Ages, regained its popularity in the 17th century Europe that has remained strong to this day.
Most of us know asparagus as the bright green spear, but there are also yellow asparagus (also called "white spears") and even purple ones. Green asparagus grows aplenty in maritime climates, which made it a very popular vegetable from Ireland down the coasts of Western Europe into Spain and even into Germany. The white variation (also called spargel) is popular in Germany, France, Belgium and Netherlands. The white color is achieved by depriving the spears sunlight; they are routinely covered by soil throughout their growth thereby depriving them of sunlight so that photosynthesis cannot occur and therefore turn green. White asparagus is much sweeter in taste. Italy began cultivating a purple variety but many don't prefer it as it's high in sugar and lower in nutritional value. Asparagus has been widely cultivated for centuries throughout most of Europe, Northern Africa and parts of Asia. In fact Asia is the highest producer in the world today of asparagus.
Asparagus is a wonderfully nutritious vegetable, as it's high in various vitamins (B6, A, C, E, K) and minerals, as well as being a great source of fiber and folic acid. It's low in sodium and calories as well, which makes it a great vegetable if you're watching your weight. It is not as widely known that asparagus possesses medicinal qualities as well, in larger quantities acting like a laxative and diuretic.
But its delicate flavor is what sets it apart. Asparagus is both tender and hardy at the same time, which yields itself to various cooking techniques. It can be boiled, roasted, grilled, and even pickled. It compliments any protein and can stand on its own as a dish. Because of its shape, it can be wrapped with other foods like thinly sliced prosciutto or smoked salmon, or even cheese. It can also be cut up into smaller pieces for salads or pastas, or can be left long and picked up as a finger food. Its underlying lemony-woodsy flavor yields itself nicely with fresh lemon and herbs as well as more formidable flavors like garlic and ginger. The versatility of asparagus has truly made it a universal ingredient, taking forms and shapes within the world's different cuisines.
But for me personally, my favorite way to prepare asparagus is to simply roast it with some good salt and pepper and olive oil. It brings out the deep underlying flavors of the asparagus and the roasting process gives a nice crunchy caramelized outside with a soft and concentrated sweet inside. A simple aioli on the side for dipping and you have a delicious appetizer or side dish.
Roasted Asparagus with Quick Garlic "Aioli"
1 bunch asparagus
extra virgin olive oil
good sea salt (recommended: Fleur de Sel)
freshly ground black pepper
2 Tbsp mayo
1 large (or 2 small) garlic cloves, minced
1 tsp freshly squeezed lemon juice
1 tsp lemon zest
1/2 tsp fresh thyme leaves
Preheat oven to 400 degrees.
Take one of the asparagus spears and hold one end in each hand. Bend the spear to snap it and you'll find it will snap on its own. This point where it breaks is the natural border between the tender part and tougher stem. Line this spear back up to the others and cut the bottoms off to match the first spear. You now have tender asparagus spears.
Toss the spears in some olive oil (about 2-3 tablespoons depending on how large your asparagus spears are) to coat well. Spread them out on a baking sheet and sprinkle with salt and pepper. Roast in oven 10-15 minutes or until tender and slightly caramelized. You'll want to shake the pan once halfway between cooking to ensure even caramelizing.
While the asparagus cooks, make the "aioli." Combine the mayo, garlic, lemon juice and zest, thyme, and a pinch of salt and pepper and mix well.
My Notes:
I use quotations for aioli because true aioli is made from egg yolk and oil mixed very slowly together to make a fresh mayonnaise. You can certainly do this (and add the garlic more as a paste) which would produce amazing results. But this is for a quick dipping sauce so I substitute with a good quality store-bought mayo. I like Best/Hellman's.
It is imperative to use fresh lemon for the zest and juice; never use the bottled juice!
The cooking time will vary depending on how thin or thick your asparagus are. If you're using the first asparagus of spring (the very thin spears), you'll want to reduce your cooking time even more to around 7 minutes. If you're using fresh asparagus that's a half an inch or more in diameter, you'll have to cook them longer.
This recipe can be easily doubled or tripled.
Gno-Thank You
Monday, March 22, 2010
As my readers, I asked and you told me what to make next. You all voted for gnocchi and I enthusiastically said "yes!"
I started out doing relatively extensive research on how to make gnocchi and found most recipes to be quite similar: boiled baking potatoes, flour, egg, salt. And that's it. Sounds easy enough, right?
WRONG!
What came forth was a disaster of culinary proportions, an embarrassment to the Italian cuisine. I, of all people, managed to make not the pillowy goodness that is The Gnocchi, but rather one of two items: mush or rock.
Impressive, isn't it?
Let me explain...
I settled on two recipes for gnocchi that I thought would be full-proof. One, from Bon Apetit magazine and the other, from Italian Culinary God Mario Batali. I mean, how you could go wrong with Batali? Wrong. Very, very wrong.
Or at least I did.
Despite the minimal ingredients, the two recipes varied drastically in their preparations. BA said to bake the potatoes while Mario said to boil them whole. Since it was already 7:00 when I started making this dinner, I went with boiling. Because, after all, it's Mario frickin Batali. I boiled them and peeled them just as he said and ran them through a potato ricer with surprising ease and in 30 seconds I had potato fluffiness.
I was giddy with optimism.
Then add the flour. Both said to use all-purpose -- check!
Then another variation: BA said to use 1 egg yolk while Batali said to use a whole egg. So I erred on the side of Batali again. Because he wears orange clogs and any man of that size who wears orange clogs is secure in himself. And therefore in his cooking. And henceforth am I secure in him.
Then a pinch of salt, make the well in the middle, mix with fork and voila a dough has been made.
BA said to add a pinch of nutmeg which I also omitted because that sounded just weird.
At this point my trusty sous-chef Andrew (aka The Eye-Talian) came over to help me with the boiling process. As I divided the large ball of dough into 4 small balls, then rolled them out one by one into the rope and cut them into gnocchi-sized pieces, I'd hand off and he'd boil. I thought he could handle that.
Wrong again.
Apparently my dough was too warm as the pieces couldn't even keep the fork ridges. After you cut the rope into the little pieces you're supposed to roll them on the back end of a fork to get those little lines we all know are gnocchi. I got so frustrated I just cut and threw them at Andrew. And he cooked them...
...into oblivion.

The raw dough when added to a pot of salted boiling water sinks to the bottom like boulder, then rises to the top when done. Yet another variation on the cooking process between my two sources: BA said to cook them an additional 4 minutes after they rose to the top while Mario said to pull them out and into an ice bath right as they reach the top. Um....huge discrepancy there guys!! Thanks for that! Didn't matter anyway...
Me: "Hey, so how's it going there?"
Andrew: "Good."
Me: "Are they done yet?"
Andrew: "No."
(long pause)
Andrew: "How do you know when they're done?"
Me: "When they rise to the surface. Or 4 mintues after. Depends on who you're asking."
Andrew: "Oh."
(another long pause)
Andrew: "'Cuz these have been cooking for like 7 minutes."
Me: "OH MY GOD!!!! GET THEM OUT!!!!!"
No bueno.
Ended up being a sticky, globular mess of epic proportions. Extremely unappetizing.
Luckily I had literally pounds of extra gnocchi dough so we tried again, this time pulling them as they rose to the top like Batali said.
Better.
I made a wild mushroom ragu to go along with them and topped with shaved Parmesano-Reggiano.

Unfortunately, I'm embarrassed to say it looks a lot better than it tasted. It was horrible. The gnocchi were "weird", the ragu was "meh" and the whole dish needed a saltier Pecornio instead of the Parmesan that seemed pathetic in comparison to the monstrous disaster it sat upon. The gnocchi this time around held their shape...enough...but still tasted "gooey." Gnocchi shouldn't taste gooey.
So here's my conclusion:
Despite the minimal ingredients and overall inexpensiveness of the whole gnocchi thing, it's far too much trouble than it's worth. Find a good restaurant that make gnocchi and just get them to do it for you. This was a pain in the ass that made a huge mess and in the end pissed me off.
And pillowy yum yums shouldn't piss one off.
So the final verdict is...
The Great Gnocchi Experiment: EPIC FAIL
You Asked, I Answered: Challah Back! Challah French Toast Makes A Great Brunch
Tuesday, March 16, 2010
My friend Damilya asked me recently for some brunch recipes since brunch is her (and my) favorite meal to prepare. Despite its name, French Toast has become an American staple for a tasty brunch. Ina Garten's recipe uses challah, a sweet egg-based loaf bread, that gives a perfect sturdy texture to soak up the orange-infused batter. This is wonderful on a cold winter morning or a hot summer day.
Challah French Toast
6 extra-large eggs
1.5 cups half-and-half or milk
1 tsp grated orange zest
1/2 tsp pure vanilla extract
1 Tbsp good honey
1/2 tsp kosher salt
1 large loaf of challah or brioche bread
unsalted butter
vegetable oil
To serve:
maple syrup
good raspberry preserves (optional)
sifted confectioners' sugar (optional)
Reheat oven to 250 degrees.
In a large shallw bowl, whisk together the eggs, half-and-half, orange zest, vanilla, honey, and salt. Slice the challah in 3/4 inch thick slices. Soak as many slices in the egg mixture as possible for 5 minutes, turning once.
Heat 1 tablespoon butter adn 1 tablespoon oil in a very large saute pan over medium heat. Add the soaked bread and cook for 2 to 3 minutes on each side, until nicely browned. Place the cooked French toast on a shweet pan and keep it warm in the oven. Fry the remaining soaked bread slices, adding butter and oil as needed until it's all cooked. Serve hot with maple syrup, raspberry preserves, and/or confectioners' sugar.
My Notes:
A super pretty garnish if you're planning to make this for a party is to lay out the slices of French toast on a nice white platter and garnish with fresh orange slices on the sides of the platter or in between some of the slices of French toast. Not only does it give the eater a visual representation of what's in the French toast (orange from the zest) but it looks damn pretty and people can eat it too!
If you can't find brioche or challah bread then use a good French bread. If it's a day old, then even better!
Give a generous dusting of confectioners' sugar (aka "powdered sugar") on the platter before serving. Makes a pretty presentation and great taste.
Week Night Yum Yum: Herbed Baked Chicken with Garlic Green Beans
Wednesday, March 10, 2010
Chicken breasts are often a go-to dinner staple. We've grilled it, fried it, roasted it and poached it. But sometimes it's too cold outside to grill it, we're too fat to fry it again, we don't have time to roast it, and poaching it...well...we find that icky unless it involves champagne and pears. But have you tried baking it...
If you have, you probably ended up with chicken jerky. Because boneless and skinless chicken breasts lack the bone to give it flavor and the skin to keep it moist, you often end up with a stringy, dry product that you need to literally drown in a sauce or salad dressing to chew through it. But no more.
My answer to that is using a wet rub. Often used in bbq, this seasoning technique can be applied to baking as well with amazing results. A dry rub involves a combination of dried herbs heavily crusted onto a protein. This creates a crust that gives amazing flavor and keeps the inside nice and moist. You can do the same technique with baking. By adding a little oil (any kind will do) to the dry rub mixture, you're replacing the fat that a whole chicken or bone-in chicken breast with skin would have, which ensures a moist chicken breast instead of the dry stringy yuckiness. You can make any rub combination you like: dried herbs (as featured below), southwestern with cumin and ancho chile powder, even asian with wasabi or chinese mustard, ginger powder and brown sugar.

Herbed Baked Chicken
2 tsp kosher salt
1 tsp freshly ground black pepper
2 tsp onion powder
2 tsp garlic powder
2 tsp herbs de provence
2 Tbsp olive oil
4 boneless, skinless chicken breasts
Preheat oven to 350 degrees.
Line a baking sheet with aluminum foil for easy clean up.
Combine the salt, pepper, onion and garlic powders, and herbs de provence with the olive oil in a small bowl and whisk together until a sandy paste is formed. Lay out the chicken on the baking sheet and baste the chicken with the wet rub using a basting brush on both sides. Place in oven uncovered and cook for 40 minutes or until chicken is cooked through (cooking time with vary depending on how thick the chicken breasts are). Serve hot.
Easy Weeknight Garlic Green Beans
1 steam-in-bag mix green and yellow beans
2 cloves garlic, minced
extra virgin olive oil
kosher salt
freshly ground black pepper
Place bag of beans in microwave and cook on high for 5-6 minutes (or according to package directions). Heat a couple of tablespoons of olive oil on low heat in a large saute pan. Add the garlic and cook for a minute until fragrant, then add the beans and toss to coat well. Cook for 3-5 and serve hot.
My notes:
Herbs de provence is a spice combination of dried thyme, savory, basil, fennel seeds, and lavender. Other combinations also include dried rosemary and/or oregano as well, but thyme is the dominant herb. You should be able to find this spice combination at your local grocery store or Williams-Sonoma, but if you can't you can certainly make your own in a large batch and keep it for up to a year in an air-tight glass spice bottle. It's wonderful with chicken, fish, and soups and stews.
Make Ahead Tip: prep your chicken first thing in the morning and refrigerate covered until you're ready to bake it for dinner.
Green beans are what I had on hand when I made this meal -- you can certainly substitute asparagus or broccoli for a quick garlic saute side dish as well. I like to invest in a few of these steamable bags of veggies because they make a quick and healthy side dish literally in five minutes.
If you have, you probably ended up with chicken jerky. Because boneless and skinless chicken breasts lack the bone to give it flavor and the skin to keep it moist, you often end up with a stringy, dry product that you need to literally drown in a sauce or salad dressing to chew through it. But no more.
My answer to that is using a wet rub. Often used in bbq, this seasoning technique can be applied to baking as well with amazing results. A dry rub involves a combination of dried herbs heavily crusted onto a protein. This creates a crust that gives amazing flavor and keeps the inside nice and moist. You can do the same technique with baking. By adding a little oil (any kind will do) to the dry rub mixture, you're replacing the fat that a whole chicken or bone-in chicken breast with skin would have, which ensures a moist chicken breast instead of the dry stringy yuckiness. You can make any rub combination you like: dried herbs (as featured below), southwestern with cumin and ancho chile powder, even asian with wasabi or chinese mustard, ginger powder and brown sugar.
The great part of this is you can easily double the recipe to stretch the chicken into another recipe for later in the week. Make herbed baked chicken with green beans and some store-bought rolls or biscuits for dinner tonight and use the extra chicken in a chopped salad or pasta dish tomorrow night.

Herbed Baked Chicken
2 tsp kosher salt
1 tsp freshly ground black pepper
2 tsp onion powder
2 tsp garlic powder
2 tsp herbs de provence
2 Tbsp olive oil
4 boneless, skinless chicken breasts
Preheat oven to 350 degrees.
Line a baking sheet with aluminum foil for easy clean up.
Combine the salt, pepper, onion and garlic powders, and herbs de provence with the olive oil in a small bowl and whisk together until a sandy paste is formed. Lay out the chicken on the baking sheet and baste the chicken with the wet rub using a basting brush on both sides. Place in oven uncovered and cook for 40 minutes or until chicken is cooked through (cooking time with vary depending on how thick the chicken breasts are). Serve hot.
Easy Weeknight Garlic Green Beans
1 steam-in-bag mix green and yellow beans
2 cloves garlic, minced
extra virgin olive oil
kosher salt
freshly ground black pepper
Place bag of beans in microwave and cook on high for 5-6 minutes (or according to package directions). Heat a couple of tablespoons of olive oil on low heat in a large saute pan. Add the garlic and cook for a minute until fragrant, then add the beans and toss to coat well. Cook for 3-5 and serve hot.
My notes:
Herbs de provence is a spice combination of dried thyme, savory, basil, fennel seeds, and lavender. Other combinations also include dried rosemary and/or oregano as well, but thyme is the dominant herb. You should be able to find this spice combination at your local grocery store or Williams-Sonoma, but if you can't you can certainly make your own in a large batch and keep it for up to a year in an air-tight glass spice bottle. It's wonderful with chicken, fish, and soups and stews.
Make Ahead Tip: prep your chicken first thing in the morning and refrigerate covered until you're ready to bake it for dinner.
Green beans are what I had on hand when I made this meal -- you can certainly substitute asparagus or broccoli for a quick garlic saute side dish as well. I like to invest in a few of these steamable bags of veggies because they make a quick and healthy side dish literally in five minutes.
Mastering French Cooking? Try Practicing It First!
Tuesday, March 2, 2010
I was fretting about how to write this post without being controversial, and then I thought "What am I doing?! That's the point!" and so I'm going with it.
Mastering the Art of French Cooking by Julia Child and her French cohorts Louisette Bertholle and Simone Beck has gained popularity this year because of the film Julie & Julia, for which the great Meryl Streep has been nominated again for her kind of scary, dead-on-balls accurate portrayal of Julia Child. Of course, people got excited and ran out to buy the encyclopedic treatise on French cooking translated for Americans. And I was one of them. And yet I've never actually made a recipe out of the book! And I've owned it for a year now. And I have other friends who've done the same thing. Every "serious cook" has a copy on their cookbook shelf. In fact, many aspiring home cooks go out and buy this as their first official cookbook. Yet never really get past the first chapter. Or make even one recipe Why?
Because the book sucks as a cookbook.
There, I said it.
Simply put, it's quite literally a direct translation of French cooking. All of it. Hence, it's impressive volume (or two). French cooking can be some of the easiest food you can prepare -- roasted chicken with potatoes and vegetables...in one roasting pan...with nothing but fleur de sel, freshly ground pepper and fresh herbs?? Yes please! But still a lot of French cooking, steeped in history and making use of local ingredients both evil and benign (snails anyone?), can be downright intimidating. On a good day. Most of the time, they sound both impossible and frankly, not that tasty.
Take, for example, Aspic. Aspic is a dish where other ingredients (meat, vegetables or even fruits) are set into a jelly that was made popular in the Middle Ages when cooks found they could keep food longer by "suspending" it in this jelly substance. Sound easy enough? We've all seen the Jell-O with pieces of fruit on the buffet at Sizzler's growing up back in the 80s. I get it. But no...there's more...much, much more...
How about meat suspended in beef flavored jiggly jelly made with the natural fats and gelatin found in the cartilage of your choice meat product. A little funky now, no? And try making this yourself! Honestly, does any average American even eat this, let alone want to know how to make it?
Or how about recipes for liver, sweetbreads, brains and kidneys. All lovely dishes, I'm sure, but ones I frankly would rather leave up to restaurants in New York to do for me. Why? One huge reason that Ms. Child failed to anticipate: you can't find these ingredients! We don't live in France!
My parents always make some of these funky dishes for Christmas and Easter. Christmas in fact always has a bit of Piftie (pronounced "piff-TEE-eh") that is boiled pig's feet in a gravy-flavored gelatin. I ate it once. When I was 5, to humor my grandma. And it's not my favorite thing. But when they do make it they have to venture out of the confines of their suburbia bubble in La Crescenta and mingle with the real people to get the proper ingredients. Many a time I remember being dragged on one of these day-long excursions, usually involving some skiddish European market with a letter or two missing on the sign, and at least three men outside with stained white t-shirts that pull up just above their hairy bellies, smoking cigarettes and drinking Turkish coffee. It was terrifying. And then we'd go in and through the stench of non-refrigerated produce and meat products, past the cured meat section that ran loud with the sound of industrial sized meat grinders making fresh sausage from only God knows what, and into the waaaaaay back of the meat area to find a whole host of scary things!
Pigs feet, calf's head, pig's tails, all different kinds of testicles, spectacles and severed heads that read more of a Rob Zombie Meets Emeril Lagasse Nightmare. And these places would of course be located (always) in the valley. Where porn is also shot. How lovely.
I remember these details and shockingly it hasn't swayed me from entering the cooking arena myself. Will I do the pigs feet and calf's head soup anytime soon? No, probably not. I don't see the damn point. Will I try it once in my life? Yes. already have, thank you very much. But my point is I don't see many Americans (for whom this book was written, after all) running out to a shady butcher shop in the valley to buy animal "parts" to put in Jell-O.
A lot in her book is quite useful, however. Her chapter on sauces is easy and straightforward, her recipes for gratins, souffles and quiches are easy enough. Desserts are hit and miss in terms of difficulty. But what I do find very interesting is the renaissance of Julia Child within our generation, and how we can't admit we're struggling with it.
If you're like me, you're a ___old mom who either stays home with the kids and works desperately to take her food blog off the ground and writing a cookbook, or working part time or full time with a career. Long gone are the days of moving to Paris with your husband and being "bored" to the point where you have nothing left then to enroll yourself in Le Cordon Bleu cooking school. Um...nowadays if I can manage to take a shower once a day I consider it an accomplishment. Le Cordon Bleu classes? I'm happy to make a farmer's market once a year. Despite my thirst for knowledge and cooking, I simply don't have the time (or means) to make snails for dinner. Sorry, Julia. I don't live near a Dean & Deluca. And I don't think that makes me a bad cook or not serious about cooking.
The reality is that Julia Child's book just doesn't translate anymore. Not in this age. And it's mostly because she assumed (incorrectly) that Americans would (a) have the opportunity to try French food on a regular basis as she did and (b) that we'd all want to make it all the time. It's hard. It's not at all conducive for an average American wife (again, for whom the book was written), schlepping 2.5 kids to and from school and to their soccer practices, etc. and working on her own side gig, etc. to stop all of this and start making cassoulet. It's not going to happen. Grandma's make cassoulet because grandmas have time to make mother-effing cassoulets!
What bugs me is I see and hear all the time that people who get inspired to cook run out and buy this book because it's whispered about like it's a demi-god of some type. Then they open it up and close it immediately, not even being able to pronounce half of the recipes. Then they get discouraged and give up cooking. And that pisses me off.
Mastering The Art Of French Cooking will most certainly NOT teach you how to cook. Period. It will teach you to make classic French dishes. But I strongly believe you need to first have French food to see what it's even about before you try making it. Eat escargot before you try making it. Try quiche first so you know what it's supposed to taste like. Then go and try to make it. And don't feel bad at all about not being able to. This kind of French cooking is hard and takes practice.
Look, Julia Child wrote an excellent piece -- a wonderful collection of translated culinary keepsakes. A record of French history like Gregory of Tours. And that in and of itself makes her work invaluable and a treasure, and earns its rightful place on one's cooking shelf. And you should look at it that way. And when you've practiced a bit and feel comfortable trying some of her recipes, then go for it. And know that you should be making them a few times before you get the hang of it. And that's ok! But if you want real recipes to actually make for dinner, then try Ina Garten's Barefoot in Paris. She hits all the main points of French cooking you'll actually want to eat and not kill yourself making.
Week Night Yum Yum: Rigatoni with Eggplant and Smoked Mozzarella
Monday, March 1, 2010

One of my all-time favorite pasta dishes is the Barilotti alle Melanzane e Scamorza from Canaletto's in Newport Beach. It's a barrel-shaped pasta with eggplant, tomato sauce, basil and melted smoked mozzarella cheese. Yes, I said smoked mozzarella cheese. It's wonderful. The pasta is soft yet sturdy, the eggplant is tender and sweet, the sauce is a delicately herbed and has a hint of sweetness and tartness about it. And the smoked mozzarella adds a warm, smoky flavor that just elevates the whole dish into a whole new arena of comfort food.
If you life in Orange County, it's worth a trip to Canaletto's. If not (or you just can't make it out all the time like me), then try this recipe below. I think I've come pretty close to recreating the dish, definitely hitting on the major flavor points and overall feel of the dish. I couldn't find (or have the patience to make) the pasta they use from scratch, but a good rigatoni will more than get the job done. By roasting the eggplants, I bring out their natural sweetness and can achieve that heavenly soft texture that just melts in your mouth. And with some store-bought help with my favorite marinara sauce, this becomes a weeknight meal you can prepare in a snap, but the quality is like a Saturday date night out.
Rigatoni with Eggplant and Smoked Mozzarella serves 2 large portions or 4 small
1/2 pound rigatoni pasta
extra virgin olive oil
3-4 Japanese (or Chinese) eggplants or 1 small Italian eggplant
1/2 cup white onion, chopped small (about 1 small onion)
3 cloves garlic, minced
2 Tbsp fresh basil
kosher salt
freshly ground black pepper
1 tsp red pepper flakes
1 jar marinara sauce (recommended: Mario Batali basic marinara)
smoked mozzarella (1 ball), cut into 1/2 inch cubes
grated Parmesano-Reggiano
Preheat oven to 350 degrees.
Cut the stems and ends off the eggplants and discard. Cut each eggplant in half lengthwise, and then cut into 1 inch cubes. Place in a glass bowl (a metal one will react with the eggplant and give a bitter taste!) and coat with olive oil. Season with a good pinch of salt and some pepper and toss well. Add more oil if needed, as eggplants like to soak up all liquids. You want them to be nice and coated but not soaking wet from oil. Place in a baking dish and roast uncovered for about 20-25 minutes, or until very tender. Turn them once during the roasting process, halfway through.
Set a large pot with water and bring to a boil for the pasta. When water comes to a roaring boil, add a large pinch of kosher salt, then add in pasta. Cook according to package directions (10-14 minutes) until al dente.
In a pan, heat about a tablespoon of olive oil. Add the onions and a small pinch of salt and pepper. Cook on medium-low heat until softened, about 10 minutes. Add the garlic and cook until fragrant, about another minute. Add the red pepper flakes and about 3/4 of the jar of marinara sauce. Combine well and let cook so flavors will meld, about 5 minutes, on low heat.
When nice and tender and caramelized, remove the eggplant and place directly into the sauce mixture. Add the fresh basil and incorporate to combine. Taste for seasonings and add salt and pepper to taste. The flame under the sauce can be turned off at this point.
When pasta is cooked, drain well and place the pasta directly into the pan with the sauce and eggplant. Add half of the smoked mozzarella cheese, and toss everything to combine. Pour the pasta-eggplant mixture into a baking dish (you can even roast your eggplant in the same one and just reuse it for this!) and top with the remaining smoked mozzarella. Add a good sprinkling of the parmesan cheese on top and bake uncovered for 15 minutes until the cheese is melted and just starting to get golden brown.
Serve hot.
Serving suggestions: mixed green salad with fig-balsamic vinaigrette, medium to full-bodied red wine.
My Notes:
If you want to make this kid-friendly, then omit the red pepper flakes and proceed with the rest of the recipe. Most kids won't have a clue that they're eating eggplant and will love it!
You can make this entire dish a day in advance and refrigerate until ready to bake. Just bring out to room temperature about 10 minutes before setting into the heated oven so the cheese can melt better.
Makes great leftovers and heats very well.
I don't recommend freezing this dish as the eggplant is very delicate.
The smoked mozzarella really makes this dish, but if you can't find it, then you can certainly substitute with a buffalo mozzarella cheese. Just make sure to pat it dry very well with paper towels so it can melt properly and get a nice light brown color.
Having a dinner party? This recipe can easily be doubled or even tripled! Just make sure to double your baking dish size as well or just use two!
Subscribe to:
Posts (Atom)