Shrimp and cocktail sauce. A classic combination. A timeless appetizer. And actually very entertainer friendly.
Most of us have one oven in our kitchens, which for a holiday or even regular dinner party can prove challenging when preparing appetizers. Since most pastry dough appetizers need to be baked and served immediately, they are pretty much out of the equation when a roast or turkey are the main dish for a dinner or holiday spread. That's why a classic shrimp cocktail is always a great go-to appetizer. The shrimp can be prepared and cooked in advanced and chilled (or served at room temperature) and the sauce can be prepared even up to 3 days in advance. Who doesn't love that?
Ina Garten's recipe for shrimp cocktail calls to roast the shrimp as opposed to boiling them. It's true - by roasting, you really get to extract the natural sweet flavor of shrimp. And believe it or not, you're less like to overcook the shrimp when you're roasting it; boiling it is to direct that if you overboil for even 10 seconds, the shrimp will be rubbery and tough. Roasting really gets a nice and soft shrimp that retains its natural sweetness. Guaranteed, this will become a favorite appetizer for you too.
Roasted Shrimp Cocktail by Ina Garten
2 pounds shrimp
1 Tbsp olive oil
salt
black pepper
1/2 cup chili sauce (recommended Heinz)
1/2 cup ketchup
3 Tbsp prepared horseradish
2 tsp freshly squeezed lemon juice
1/2 tsp Worcestershire sauce
1/4 tsp hot sauce (recommended Tobasco)
Preheat oven to 400 degrees.
Peel and devein the shrimp. Toss them in olive oil and spread out on a baking sheet. Season with salt and pepper and roast 8-10 minutes until pink and just cooked through. Set aside.
Combine the chili sauce, ketchup, horseradish, lemon juice, Worcestershire sauce and hot sauce in a small bowl. Serve as a dip with the shrimp.
My Notes:
For a really spicy sauce, use a tablespoon of Sriracha chili sauce instead of the Heinz sauce.
Make sure to use grated prepared horseradish, not the cream horseradish.
Always use freshly sqeezed lemon juice; never concentrate! Especially when making a dipping sauce where freshness is key for good flavor!
Shrimp can be cooked ahead of time and then just served at room temperature. Cocktail sauce can be made 3 days in advanced and refrigerated.

The Champagne Cocktail: Updating A Classic
French champagne. Sparkling wine. Cava. Wherever it comes from and whatever you call it, I love it. And although great on its own, a little bubbly can add something special to an otherwise Been There Done That cocktail. Here are some versions I love, and with the holidays coming up right around the corner, they're a great choice for a main drink for a party or a fun twist to accompany traditional foods.
Pomegranate Champagne Cocktail
1.5 ounce pomegranate juice
1 ounce vodka
champagne, well chilled
Add the pomegranate juice and vodka in a champagne flute (or small wine glass). Top with champagne (or sparkling wine or cava) and serve immediately. Great with appetizers and for holiday cocktail parties.
Caribbean Mimosa
2 ounces tropical fruit juice blend (orange, pineapple, guava, passion fruit, etc.)
champagne, well chilled
fresh pineapple cut into 1 inch cubes
Pour the fruit juice into a champagne flute. Top off with champagne and then gently drop a pineapple cube into the bottom of the glass. Serve. This is really great for a breakfast or brunch cocktail, especially with a seafood omelet or fresh fruit platter and freshly baked croissants.
Bourbon Cooler
1 ounce good bourbon (recommended: Maker's Mark or Knob Creek)
1 ounce freshly squeeze orange juice
1 Tbsp good maple syrup (or simple syrup or sugar cube)
champagne or sparkling wine, chilled
orange peel for garnish
Combine the bourbon, orange juice and maple syrup in a shaker and add ice. Shake vigorously for 1 minute and pour into chilled wine glass. Top with chilled sparkling wine and garnish with orange peel. This is a great cocktail to brighten up dreary winter months when citrus fruits are at their peek of sweetness. Serve for a brunch with french toast casserole and maple bacon.
All the above recipes are for single cocktails. To prepare for 2 or 4 or 6 or more people, simpley multiple the amounts by that number. So for example, to make 4 Bourbon Coolers, combine 4 ounces of bourbon, 4 ounces of orange juice, and 4 tablespoons of maple syrup in a shaker and then individually distribute the mixture into 4 seperate glasses, then top each with the sparkling wine and garnish.
And for non-alcoholic versions, substitute the champagne with sparkking water like Pellegrino or better yet, gingerale!
My New Favorite Apple
Monday, November 30, 2009
 |
| [photo from localfoods.about.com] |
Have you ever heard of an Arkansas Black Apple? No, it's not something a wicked queen would give a pale, raven-haired chick who likes to hang out with short guys who mine for precious jewels. An Arkansas Black Apple is my new favorite apple.
As the name implies, it's both originally from Arkansas and the color is a deep red that turns almost black.
I think they're beautiful. And they taste even better than they look.
Contrasting this peculiar red skin is a bright yellow-white flesh that is both sweet and slightly tart in flavor. The taste is almost like combining a cherry with an apple. It's amazing.
They are hard to find, as they come into season after mid-October and are not widely grown. The good news is these are extremely hardy and can stay up to 6 months (!!!) if properly refrigerated. So if you find any at your local market, invest in a few bags full. They are amazing on their own as a snack, and I've read yield nicely into pies and applesauces.
Let's Talk Turkey
Monday, November 23, 2009
With turkey day just days away, I thought I'd post a blog with some tips for roasting a great bird.
1. Temperature Controls Everything
The biggest mistake people often make when roasting anything is keeping it at one constant temperature. A roast, no matter if beef, pork, chicken or turkey, needs to have a crispy outside and moist, tender inside. The only way to achieve this properly is with temperature. No need for ridiculous plastic bags or basting every ten seconds. The trick is in the heat. No matter how big or small your turkey is, you always need to start if off in a 450 degree preheated oven. Not 400, not 375, but 450 degrees. This higher heat will help give the turkey a nice browning to begin with on the outside, which will help lock in the juices inside, creating a moist bird. This is why frying a turkey makes such a tender bird; it's cooking from the outside in. You need to start your turkey at 450 degrees for 30 minutes, then without opening the oven door, set your oven temperature back down to 350 degrees and finish roasting your turkey until an internal thermometer reads 165-175 (about an hour and half). Obviously, the bigger your bird, the longer it will need to cook, but you must do the different temperatures if you want a moist bird with a great skin.
2. Basting
Basting the process by which you take liquid and dredge the roasting turkey during the roasting process in order to keep remoisting the skin and evenly distributing seasonings. The basting process helps give the turkey (or chicken) a nice even brown color. If you didn't baste, then half of the turkey would be golden brown and the other half would still be pale. That is not appetizing to look at. To baste, you use an aptly named baster -- a squeeze tube with which you suck up any drippings that have collected at the bottom of the roasting pan or some broth or even juice you have ready on the side. Never baste with just water -- you'll water down the flavors. Always use the turkey's own juices, chicken or turkey broth (store-bought is ok), or even apple or orange juice if using those flavors. The general rule is you want to baste every 10-15 minutes during the first 45 minutes. And make sure you baste the entire turkey, even on the sides and bottom so you can get a good overall and even browning.
3. To Stuff Or Not To Stuff?
I am not a huge fan of bread stuffing in the turkey cavity. First of all, it's not that healthy. The turkey is raw and you'll have to make sure that stuffing inside is also well cooked before you serve it to your guests. If the stuffing is not cooked all the way through, it can carry semonilla and you'll give your guests a parting gift of food poisoning, which I supposed is a good strategy if you wan to avoid cooking the dinner the following year. Assuming you don't want to get your guests sick, my vote is to skip the stuffing the turkey all together and just bake it off in a side dish seperately. Instead, use the various fruits, vegetables and herbs available to stuff the cavity of the turkey that will both flavor as well as give a wonderful smell to your turkey. Turkey is very slightly gamey in smell, which puts some people off. The use of herbs and especially citrus fruits completely takes that away. I love thinking of different combinations. My favorites are:
- lemons, orange, whole heads of garlic cut in half crosswise, rosemary and oregano
- apples, garlic, leeks
- pears, thyme, marjoram, onion
- pomegranate (whole, cut in half lengthwise), garlic, sage
- garlic, herbs (rosemary, thyme, sage, oregano)
The general rule is if using a fruit, then make sure it's one that can hold shape -- grapes will probably disinegrate in the roasting process and be a mess to remove. If using garlic, onions, shallots or leeks, you can peel off one layer (no need for garlic) and give it a good wash and then just cut in half or thirds to fit inside. For herbs, you want to use wood-stemmed herbs that are heartier and won't burn in the roasting process.
And I like to use these same ingredients to decorate the platter when presenting the turkey. If I'm doing a citrus and herb turkey for example, I'll put some large bunches of sage and rosemary around the turkey and then some lemons or clementines or whatever I used. And obviously, discard whatever you used to stuff the turkey.
4. Gravy -- 2 Schools
Where do you come down on the gravy scale? Please don't use powdered gravy. Ever. All it is is flour, salt and msg. That's it. It has no flavor and zero nutritional value and after all the work you did to make this gorgeous turkey full of flavor, you'll kill it with this limp gravy. My School Of Thought on gravy breaks down in two main ones:
1. Gravy Made Ahead Of Time: saute onions, carrots and celery until very soft, add garlic, add herbs you're using for your turkey (thyme, rosemary, sage), salt, pepper, 1 Tbs flour, then chicken broth and let cook until reduced and thickened. If you dont' want lumpy gravy then drop it all in a blender or food processor and blend until smooth. Reheat the next day for turkey.
or
2. Gravy From The Pan: when roasting yoru turkey, it will leave some drippings. This is akin to gold and should never be thrown away. Instead, use these flavors as a base for your gravy. While the turkey is resting, pour the pan drippings through a sieve and into a small saucepan (this way it collects any big pieces of herbs or fruit that may have fallen out). Add some chicken broth until the drippings dissolve and bring to a boil. In a small bowl, whisk together 1 tsp cornstarch and 1 Tsp water until the cornstarch is dissolved. Add the cornstarch mixture to the gravy and cook on low until thickened about a minute. Taste for seasonings and add salt or pepper to taste.
In both instances we're using a thickening agent: flour or cornstarch. Main difference is constarch thickens almost immediately without taste while when using flour, you need to cook the taste of flour out for a minute or so before adding the liquid.
5. Seasoning
And finally, the flavors on top of the bird. I've seen recipes call to rub the turkey with olive oil before applying seasonging. Which is fine, but I still prefer butter. I take one whole stick and leave it out at room temperature. It needs to be pretty soft and spreadable. Then using my fingers, I massage the butter all over the bird, making sure to concentrate more butter on the breast side. The butter will also help give the turkey a nice brown color and great flavor. Then I season liberally with kosher salt, freshly ground black pepper, and my favorite seasoning for turkey is herbs de provence. But you could make your own herb combination. Since the outside of the turkey is going to be exposed to the heat the entire time, I like using dried herbs which won't burn; if you use fresh herbs then they'll be morely likely to burn because they contain more moisture in them. Of course, your turkey seasoning can go as far as your imagination wants to go!
I hope these tips help you in your turkey roasting process. If this is the first time you're making turkey or if you're a seasoned vet, these are some trick of the trade I've found to get me a successful main event for a wonderful feasting day.
And Happy Thanksgiving!
MSG Decoded: Evrerything You Wanted To Know About (or Not) MSG
Wednesday, November 18, 2009
No, it's not short for "messaging."
We've all hear of it. Nowadays, we all hear about foods not containing it, and how that's supposed to be attractive to us for some reason. Yet most of us (a) have no idea why and (b) what MSG even is. It's everywhere -- in your food, when you go out to dinner, when you buy your favorite crackers, even in the shampoo you use! Some joke it's the Addiction Ingredient manufacturers sprinkle on potato chips or your favorite cookie that's the reason why "you can't eat just one." And in part, that is true.
MSG or Monosodium Glutamate is a a sodium salt of the glutamic amino acids. Translation: it's salty and natural. For example, this amino acid is naturally found in seaweed and Japanese cuisine has been using it for a thousand years to season their food. In the early 1900s, a Japanese scientist successfully separated it out and produced it into a crystalized form, just like ordinary table or kosher salt (not sea salt...that's natural from the actual sea). MSG was then pattened, packaged, and sold as an ingredient to cook with just like we would with salt. Here's what it looks like in packaged form:
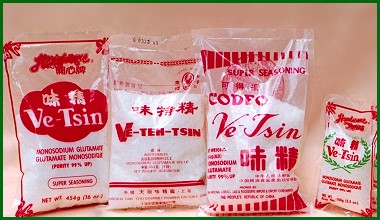
And a close up of the crystals:

We've all hear of it. Nowadays, we all hear about foods not containing it, and how that's supposed to be attractive to us for some reason. Yet most of us (a) have no idea why and (b) what MSG even is. It's everywhere -- in your food, when you go out to dinner, when you buy your favorite crackers, even in the shampoo you use! Some joke it's the Addiction Ingredient manufacturers sprinkle on potato chips or your favorite cookie that's the reason why "you can't eat just one." And in part, that is true.
MSG or Monosodium Glutamate is a a sodium salt of the glutamic amino acids. Translation: it's salty and natural. For example, this amino acid is naturally found in seaweed and Japanese cuisine has been using it for a thousand years to season their food. In the early 1900s, a Japanese scientist successfully separated it out and produced it into a crystalized form, just like ordinary table or kosher salt (not sea salt...that's natural from the actual sea). MSG was then pattened, packaged, and sold as an ingredient to cook with just like we would with salt. Here's what it looks like in packaged form:
And a close up of the crystals:
As you can see, they are differently shaped than a regular salt crystal -- thinner and longer rectangles than a more square and clustered crystal of a kosher or sea salt.
MSG is also used as a flavor enhancer. In the late '90s two researchers from the University of Miami claim to have discovered another taste bud, which they named "umani." Umani means "yummy" in Japanese, and is a taste bud that seems to be quite sensitive to MSG, which gives a meat-like flavor. When this taste bud is stimulated, it stimulates your appetite so you want more. Hence, the "I can't eat just one" phenomenon.
So what's the big deal then?
Monosodium glutamate is a naturally occurring amino acid in proteins. As stated above, it's found in abundance for example, in seaweed. It's also found in other plants and animal proteins. Our bodies even make its own amount of this amino acid. It makes enough to the point where our body does not require us to ingest more of it, like water or vitamins. Although naturally found in other products, Japanese scientists and manufacturers figured a way to reproduce the same amino acid from semi-non-natural forms. By using controlled bacteria in the fermentation process, they reproduced this same amino acid. The "problem" of MSG as produced this way lies in this bacterial fermentation process. It is not the natural way this amino acid is formed in our bodies or in seaweed. And there have been reports of subsequent allergies to the bacteria that are used in this fermentation process.
Hence, we hear MSG is bad.
Some of the more common allergies to MSG include more traditional allergic reactions (trouble breathing, swelling, nausea, headache, asthma symptoms, dizziness, facial pressure), stomach cramps, diarrhea, vomiting, joint aches and pains, sleepiness and lethargy. Other reactions reported but not completely substantiated include mood swings, depression, hyperactivity, disorientation, and insomnia to name a few. Across the board the side effects affect the brain, which is why MSG is of particular concern.
There have been studies done but given that MSG is still a relatively "new" product on the market (in major circulation since the late '60s), it is difficult to tell exactly how the human body processes this manufactured amino acid, and what (if any) side effects are actually directly related to it.
Regardless of which side the experts are on, both sides agree that MSG in large quantities and repeated, consistent use is probably not a good thing. MSG in moderate usage (ordering in Chinese tonight?) is probably ok. But as a mother myself, I get a little nervous about giving it to my children at all.
Most of the time we don't even know if we're buying products with MSG in them. Here's how to tell:
- it will actually say MSG or monosodium glutamate in the list of ingredients
- also known as Ajinomoto, Vetsin, and Accent
It is often found:
- in most fast food restaurants
- in seasoning spice blends (not individual spices like ground cinnamon or dried thyme)
- pre-prepared stocks and bouillon cubes
- condiments like bbq sauce, salad dressing, steak sauce, worchester sauce, ketchup, mayo
- soy sauces, tamarind (naturally present)
- powdered seasoned items (boxed rice mixes, flavor packets like taco seasoning mix)
- dairy products (milk solids and proteins)
- convenience foods (chips, crackers, candies, quick meals)
- deli meats, sausages
And is found naturally in:
- tomatoes
- mushrooms
- corn
- soybeans
- peas
- wheat & barley
- beer (by way of wheat, barley, yeast)
- yeast
- meat
- fish
- milk
- cheese (by way of milk)
MSG can also be found in shampoos, deodorants, creams, medications (both topical and ingested) and other products.
It's often sprayed on growing fruits and vegetables.
MSG is banned by law to be included in organic foods, but sometimes technically it is still present (as in the milk solids described above). Sometimes during the breakdown of yeast, MSG will form. Therefore, if a product labeled as organic includes yeast or a yeast extract, it will probably also include some amount of MSG. That's why it is also found in breads, desserts and beer.
For the most part it seems MSG as a natural element is harmless to humans. Afterall, the human race has been consuming proteins, fish, milk, cheeses, and wheat and barley (and frankly, drinking beer) for thousands of years with no major implications. I think what concerns some people is the unnatural manufacturing of it by using bacteria and the side effects that might be coming from those in elevated amounts. Let's be honest -- our ancestors weren't consuming steaks with A1 sauce, beef tacos with powdered seasoning packets, or potato chips on a regular basis. And what is of concern is how easily these MSG-laden foods are given to our children. A typical lunch for me growing up was a sandwich (deli meat, bread, mayo/mustard all have msg), a helping of chips (msg), some sort of cookie or candy for dessert (msg) and fruit drink. And that was pretty standard back then and even now. And in our culture where we are so quick to do the fast food thing or order take-out...the levels of MSG add up in one week considerably.
Here is a great link for more information if you think you do have an MSG allergy or wish to read up on food to avoid.
Sound Of Music Cinnamon Rolls
Last month during my stint with the San Clemente Stake's production of The Sound of Music, they sold cinnamon rolls at the concession during intermission. They were amazing. Although I haven't actually made the recipe yet, I tasted them and they were amazing. This recipe below yield a few very large cinnamon rolls, which would be perfect for a school bakesale or church fundraiser. Or, one hell of a holiday brunch.
Sound of Music Cinnamon Rolls
4 cups milk-water (1 can evaporated milk + water to make a total of 4 cups of liquid)
8 Tbsp self-rising yeast
1.5 cups sugar + 2 tsp, divided
8 cups bread flour, "scant" *
1 T salt
2 cups melted butter
8 eggs
cinnamon sugar (1/3 cup granulated sugar + 2 Tbs ground cinnamon)
frosting (recipe follows)
Preheat oven at 350 degrees.
Combine the evaporated milk-water liquid, yeast, and 2 tsp of sugar in a bowl and let stand until the yeast becomes "active." In the bowl of a standing mixer fitted with the paddle attachment, combine the milk-yeast liquid, 1.5 cups of sugar, bread flour, salt and eggs and mix until incorporated well, about 10 minutes, forming a sticky dough.
Let stand at room temperature for 10 minutes.
Flour a marble top, counter top, or whatever you use to roll out dough, as well as your rolling pin. Roll out the dough into a rectangle, about 1/2 inch or so thick. Brush the top of the dough with the melted butter. Sprinkle the cinnamon sugar on top.
Roll the dough lengthwise into a long log. Cut into 1.5 inch pieces. Line a baking sheet with parchment paper and place the cinnamon rolls on top, spacing out at least 2 inches (the cinnamon rolls will puff out as they cook). Bake for 13-15 minutes until soft, very lightly golden on the top and puffed out.
Remove and let to cool for 10 minutes before frosting.
Cream Cheese Frosting:
1 cup butter
1 box powder sugar
4 oz cream cheese
1 tsp vanilla
milk as needed to thin
Combine all of the ingredients above in the bowl of a standing mixer. Use the milk to thin the frosting out as needed and to desired consistency. Using a flat knife or frosting spatula, frost the tops of the cinnamon rolls while cool but still a little warm. Serve.
Some Notes:
*"Scant" means taking your measuring cup and lightly taking up the flour; it will not make a full cup of flour, and you don't need to level it off with your finger or knife. It's an approximation, so "1 cup scant" roughly translates to between 3/4 cup and 1 cup in terms of measuring. Try to aim to get between that amount.
Bread flour is different than all-purpose flour and it must be used for this recipe as it has levening agents added to it already. This is why you don't need to add baking powder to this recipe. You can find bread flour in the baking aisle of your grocery store.
Cinnamon-sugar is to taste. Some people like it more sugar to cinnamon ration, or conversely. The above is an average ration, so adjust with your own taste preferences. Nuts may also be added if desired. I like using finely chopped pecans or walnuts to something like this. The nuts should be mixed in with the cinnamon-sugar and added at the same time.
Cinnamon rolls can keep up to 3 days in an air-tight container. To rewarm, place in a 250 degree oven for 5-7 minutes or alternitavely, microwave for 30 seconds.
Vampire Kiss Martini
Tuesday, November 17, 2009
Yes, well...this week with the premiere of New Moon we're going to showcase some vampire stuff so if you're not into the vampy, then move on. Regardless, this sounds like a pretty yummy cocktail.
It's a twist on the French Martini (which, by the by, I love).
Vampire Kiss Martini
1.5 oz good vodka
1.5 oz champagne
3/4 oz chambord
red sugar for rim
Combine white granulated sugar with red food coloring. Set aside in a shallow dish. Dip the rim of your martini glass in the red sugar and set aside.
Pour vodka and half of the chambord in a martini glass. Top with champagne. Pour the remaining chambord over the back of a spoon to make it float.
Here's what it looks like:

 I don't like that so much, but I'm digging the goblet as opposed to the martini glass.
It's a twist on the French Martini (which, by the by, I love).
Vampire Kiss Martini
1.5 oz good vodka
1.5 oz champagne
3/4 oz chambord
red sugar for rim
Combine white granulated sugar with red food coloring. Set aside in a shallow dish. Dip the rim of your martini glass in the red sugar and set aside.
Pour vodka and half of the chambord in a martini glass. Top with champagne. Pour the remaining chambord over the back of a spoon to make it float.
Here's what it looks like:
See how by letting the remaining chambord drip on the back of the spoon you can actually get it to float on the top of the champagne? So pretty.
If you want the drink stirred together to achieve a spooky red color, then:
I don't like that so much, but I'm digging the goblet as opposed to the martini glass. And this is why you use white sugar mixed with red food coloring:

The food coloring I think will add just enough moisture to create a damper sugar (as opposed to using just red sugar crystals), which allows it to drip along the sides like blood.
So cool!
Ok, so maybe a little too Halloween but it sounds very tasty. I think I will try it sans "blood" on Friday before the movie (!). Can't wait!
No-Cook Thanksgiving Appetizers
Let's face it, most of us have one oven and it's being taken up by the turkey on Thanksgiving. If we can get in a pie earlier that morning to bake, it's an accomplishment. But if people are coming over and especially if they're watching the game, you'll need some munchies to snack on. And the last thing you need is to be troubling yourself with Made From Scratch bites as a prelude to the main event.
Store-bought items were invented for days like this. These are some of my go-to store-bought items I use to leave out to the side for people to munch on that won't fill them up too much, will go with their cocktail or beer, and that won't require me to dirty a pan.
1. Cheese Platter
Everyone loves cheese. And a host/hostess loves a platter where the guests can help themselves. It's about what cheeses you choose and how you arrange them that matters most. Invest in cheeses that are designed to stay out at room temperature. Don't get cheeses that are better served cold. With the traditional flavors of Thanksgiving, I like to do just two cheeses out to munch one: one creamy cow and one aged goat. That's it. Some lovely green grapes to the side on the platter and water crackers and you're done without ruining people's appetites for dinner. For creamy cow cheeses, I love a classic French brie. I'm not a huge fan of the American bries, so I will pony up for the imported French one, especially for a special occasion like Thanksgiving. Should set you back between $10-15 for a good wedge that would serve 6 people. For goat, I like an aged goat cheese like a gouda goat. These are different than the soft goat cheese logs which are also very tasty, but I feel the aged goat offers a more solid texture in contrast to the creamier brie. I like simple water crackers on the side and a nice, big dramatic collection of green grapes. Don't forget to include a cheese knife so your guests can help themsleves!
2. Kettle Potato Chips
Seriously. I'm not talking about the Ruffles with Ridges concentrations of salt that go with a lifeless ranch dip. I'm talking about very thinly sliced, perfectly crispy kettle potato chips. Especially if you're planning to serve cocktails before dinner, these are a great no-cook appetizer that will not fill your guests up. I love Kettle Brand chips in salt and pepper.
3. Mixed Nuts
Another classic. The important thing for a nut selection is that they be roasted. Don't buy unroasted nuts because they are tasteless. Buy them already roasted and save yourself the trouble. We're fortunate now to have access to different "nut bars" -- much like the "olive bar", it's an area of your market that might have different kinds of salted and roasted nuts. For Thanksgiving, I'd go with something more seasonal like a mixture of pecans, almonds and pumpkin seeds for a twist.
4. Sweet Potato Chips
I like to make my own for Thanksgiving, but there are wonderful brands out there that you can buy in a bag. It's another seasonal take on a classic party appetizer that will make total sense and be an unexpected surprise.
5. Simple Cold Cuts
I don't like to do a full cold cuts platter before a huge Thanksgiving feast. Everyone inevitably gets filled up on the sliced ham and salamis and cheese and then no one enjoys the turkey! But if you're having people over at least a couple of hours in advance of the turkey getting served, you might want to consider having a very scaled down version. Ina Garten does a great salami-cucumber appetzier that would be perfect. Get a good spicy salami and an English cucumber, slice them both 1/4 inch thick, and lay them out in two straight lines on a platter, alternating between salami and cucumber. Leave a nice stack of napkins next to it and your guests can help themselves!
Deviled Eggs: An Elegant Classic

This recipe is a family tradition and I'm happy to pass it along to you.
Deviled Eggs
6 extra-large eggs
kosher salt
freshly ground black pepper
1 large scallion
1/3 of a cup of good mayonnaise (recommend: Best or Hellman's) plus more for garnish
1/2 tsp fresh dill, finely chopped
Place eggs in a saucepan and cover with cold water. Set on stove and bring to a boil. When water starts boiling, turn water off and let the eggs stand in the hot water for 15 minutes. Meanwhile, prepare the rest of the ingredients.
Take the scallion and run your knife through it lengthwise, cutting it completely in half. The run your knife through the other way, finely chopping it. Set aside.
When the eggs have bathed for 15 minutes, carefully drain the hot water from the saucepan and then let cold water run over them. This will make them easier to handle. When cool enough to touch, take each egg and carefully peel off the shell and discard. Cut each egg in half and pop out the cooked yolk into a mixing bowl. The yolk should be bright yellow and full cooked through. Reserve the white part of the egg to the side (you'll restuff them with the yolk mixture later).
Take a fork and mash the yolks in the bowl until you get very tiny pieces. Add the chopped scallion and season with salt and pepper to taste. Add the mayonnaise and the dill and mix very well. Taste and adjust with seasoning as desired. Make sure you mix enough to get a smooth consistency.
To stuff the egg, spoon the yolk-scallion mixture into the cavity of the egg white where the yolk used to be, and also around the top, covering it. If you wanted a more elegant presentation, you can put the yolk mixture in a piping bag (or a plastic ziploc back) and then pipe it in with a decorative pattern. Repeat this with each egg; you could have just enough mixture to stuff each egg perfectly. At this point, you could also "decorate" the egg by carefully smoothing over a layer of mayo on top of the yolk mixture, creating the impression it is a "whole" egg again. And add a small dill leaf for garnish.
Serve immediately or refrigerate until ready to serve. Can stand out for 4 hours (not in directly sunlight!).
Eggplant Caponata: An Appetizer To Die For
I'm extremely excited to post this blog. I'm always looking for recipes that combine seasonal ingredients, great balance of flavor, and have a rustic history about them. This recipe for eggplant caponata from Mario Batali's treatise on Italian cooking, Molto Italiano, delivers all of the above in a classic, robust, colorful KO to your tastebuds. The use of cinnamon, cocoa, and dried currants in a savory dish will blow your mind and your palate with a spicy warmth that is perfect for this colder season. I warn you now...you will be making this every single week.
I'm loving this as an appetizer for Thanksgiving actually. Especially if you need food that can be made in advance and set out at room temperature, this is an easy appetizer that will get the palate moving for the big feast without making you slave away in the kitchen.
Eggplant Caponata
1/2 cup extra-virgin olive oil
1 large spanish onion, cut into 1/2 inch dice
2 cloves garlic, thinly sliced
3 Tbsp pine nuts
3 Tbsp dried currants
1 Tbsp hot red pepper flakes
2 medium eggplant, cut into 1/2 inch cubes (about 4 cups)
1 Tbsp sugar
1 tsp ground cinnamon
1/2 tsp unsweetened cocoa powder
2 tsp fresh thyme leaves of 1/2 tsp dried thyme
3/4 cup basic tomato sauce
1/3 cup balsamic vinegar
salt and freshly ground black pepper
1 baguette, cut into 3/4 inch rounds and toasted
In a 10-12 inch saute pan, heat the olive oil over medium-high heat until almost smoking. Add the onion, garlic, pine nuts, currants, and red pepper flakes and cook until the onion is softened, 4-5 minutes. Add the eggplant, sugar, cinnamon, and cocoa and cook for 5 minutes. Add the thyme, tomato sauce, and vinegar and bring to a boil. Lower the heat and simmer for 5 minutes. Remove from heat and let cool to room temperature. (the caponata can be covered and refrigerated for up to 2 days. bring to room temperature before serving)
To serve, spoon the caponata onto the crostini and arrange on a platter, or put it into a bowl with the crostini on the side so your guests can help themselves.
My Notes: I substituted 1 finely diced serrano chile for the red pepper flakes because shockingly, I ran out! The point is to get the spice from somewhere, be it dried flakes or a fresh chile.
I also added 1 tsp of capers for an added salty bite which I found perfectly balanced this dish into a rounded flavor: sweet, sour, and salty all at the same time.
If you're planning to serve this at a party then I highly recommend serving in a bowl with the sliced baguettes (crostini) on the side and letting people help themselves. Don't forget to include as mall spoon or knife to help them!
When The Going Gets Rough, I...Go To Trader Joe's
Monday, November 9, 2009

One of my all-time favorite shopping experiences is at Trader Joe's.
I love them because they tend to showcase locally grown, in-season products that are at their peek. I love that they go to local producers of produce and meat, but also look to incorporate already-made items made by locals as well, to give us a fancy pesto or interesting salsa combination to supplement our meal.
Being a mom, I've found it invaluable. Although I obviously care about and prefer to do my own cooking, being a mother during a busy work week with a busy husband on a lawyer's schedule, I sometimes find myself in a panic wondering "what the hell am I gonna make for dinner tonight?" My two kids are both under 3, so it's not like I can sit there and make pasta from scratch every day, or do a 3 hour meat sauce to go with it much to my chagrin. I needed to get real. Sometimes I need something fast, something healthy, something that will taste good and that won't cost me a fortune.
Enter Trader Joe's.
We live in Aliso Viejo, or as I like to call it The Bane Of Culinary Existence. Meaning, we have two options: fast food and bad fast food. That's it. When Trader Joe's finally opened locally I quite literally jumped at the chance to go check it out and I've been a much happier, less stressed out and more financially savvy mother/wife ever since. I've tweaked my weekly recipes now to incorporate some very reliable store-bought help when I need some help in the kitchen. I was resistant to the idea at first; when I think of the phrase "store-bought" I immediately think of Sandra Lee and then barf a little in my mouth. So although growing up and knowing the goodness first hand that is TJ's, I was still a little hesitant at first. But now I love it!
Trader Joe's has excellent pizza dough for example. I've found it in wheat, plain, and even garlic-herb. The toppings options are endless. I often pick up a wheat pizza dough and either make my own pesto if basil is in season or pick up Trader Joe's ready-made pesto, some marinated fresh mozzarella, some veggies and voila! Pizza for dinner in no time with no mess in my kitchen on a Tuesday night! Or pasta...they have tons of great pastas to choose from. I swear by De Cecco for pasta (I think it's still the best) but TJ's has great brands too I'm very happy with. They have some good sauces although I still prefer my own from scratch. They have a decent enough selection of fresh, in-season fruits and veggies to choose from, salads and salad kits, a good basic cheese selection where you can find the occasional Hmmm...That Sounds Interesting type of cheese like the brie-style goat cheese I bought a few days ago. But probably my favorite part is the prepared proteins section.
I. Love. This. A Mother's Best Friend.
Chicken breasts stuffed with feta cheese, sun-dried tomatoes and olives. Just pop the two huge portions in the oven, roast some potatoes or do a veggie and dinner is served.
Stuffed salmon filets with cous-cous and dill. A side salad with one of their great dressings, some slivered almonds perhaps and there's a healthy Thursday night meal.
Marinated flank steak -- tacos anyone?
Pork Chops. Tri-tip roast. Pork ribs. Chipotle chicken breasts. Sausages of every kind and color and flavorings. The options are endless! The way to shop at Trader Joe's if you're a busy mom is to grab one of these "prepped" items, go match a veggie or salad to it, and your week is done!
If you live in a state that allows alcohol to be sold outside of liquor store, you might love it too. Although personally I'm too much of a snob about wine and simply can't wrap my mind around consuming a $3 bottle of red for flavor rather than using it as a vehicle to just get wasted, some people can and do and that's fine. Remember: I'm a snob. They do, however, have a pretty decent liquor section for the basics: whiskey, scotch, port, vodka, bourbon, etc. so you're sure to find something you like.
But most of all I find they are reliable...enough. The products are always good. I've never found something that's old or expired or due to expire in a day or two like I have many times at my local grocery markets. Their shelves are constantly restocked, so they are almost never out of anything. Only place it gets a little scant is around 9 pm in the bread section. Sometimes they won't have a specialty item like creme fraiche or a certain kind of squash, but I won't sweat the small things.
And who doesn't love a place that always gives out samples??? Seriously, it's the little things. I love that. My daughter Catia gets so excited to get samples and stickers too. And I like how they force their employees to be nice, smile and greet you, and ask if you need help. Honestly if I have to get an attitude from Vons or Ralph's one more time, I'm going to slap somebody. Since when did we forget the importance of customer service? God knows we pay enough in premium prices that we shouldn't get an attitude or someone who's stocking produce who doesn't know what jicama looks like (wtf?!).
They have a sense of pleasing their customers. I also love their humor. They wear horrendous faded Hawaiian shirts and ring a bell to summon an employee to open a new register instead of an obnoxious loud-speaker. They change the lables of their products sometimes to reflect the ethnicity of the food. For example, a salsa would read Trader Jose's. Chuckle.
No, Trader Joe's is reliable for products as well as an experience that at the very least won't stress you out. And for a mother of two kiddos, that's invaluable.
Bon appetite!
A Simple Fall Appetizer
Tuesday, November 3, 2009
Crostini are the most virtual appetizers on the planet. It has every element one could possibly want in an easy-to-prepare bite that can be as expensive or cost effective as you need it to be. A starter for a dinner party, an easy cocktail hors d'ouvres, or a meal on their own, a version of some type is almost always on my party menu and a go-to Mercy Dinner when a busy weekday sneaks up on me.
The classic combination for a crostini is fruit, cheese, and bread. The most commonly used bread is the chiabatta:

The classic combination for a crostini is fruit, cheese, and bread. The most commonly used bread is the chiabatta:
Meaning "slipper" in Italian, it's a crusty bread with a soft, spongy middle that yields itself nicely to a crostini. The loaf is sliced, anywhere from 1/4 inch to a full inch thick depending on what you're topping it with, and is brushed lightly with a fruity olive oil before being baked in the oven for 10 minutes or even grilled. Crostini can be also done successfully using a simple French baguette, but I really do prefer the versatility of the chiabatta.
For fall flavors, I love the following classic combinations:
- sliced apples, sharp cheddar cheese
- sliced pears, bleu cheese (roquefort), toasted walnuts, drizzle of honey
- fig jam, imported prosciutto
All of the above can be whipped up in literally no time.
Just cut your bread to your desired thickness and lay out the slices on a baking sheet. Brush them with olive oil and bake in a 400 degree oven 7-10 minutes. Again, you can even grill the oiled slices on a grill for a couple of minutes on the oiled side. Top each slice with one or two slices of the fruit or a good spreading of the jam, a couple of dots of the cheese or a layering of the prosciutto, and return them to the oven another five minutes until the cheese just begins to melt. Take them out and drizzle some good quality extra virgin olive oil or some honey if working with bleu, and top with any chopped nuts if desired. If you don't like walnuts, then use pecans! Almond would go great with apples and cheddar as well. If you don't have prosciutto, just use a good ham like Black Forest or just put some sharp white Irish cheddar or a good bleu cheese. The options are literally endless.
A Halloween Celebration
Monday, November 2, 2009
One of the menus in our cookbook that I'm particularly proud of is the Samhain menu. Based off of the colors and flavors of autumn at its peak, this menu both warms and satisfies all of the senses. My friends were gracious enough to stop by for a tasting so I could try these recipes out on them and get some feedback on the recipes.
We'll start with the decorations. For a party, decorating is just as important if not more important than the food itself. It doesn't have to be a hugely elaborate thing; I've done a very simple table setting with a green table cloth and a tiny vase of 3 gardenias and some white votive candles that still is one of my all-time favorite table settings. But sometimes it is fun to go all-out and go-big. But that doesn't mean spending a lot of money!
For Halloween or Samhain, I wanted to strike a visual balance between living and dead things. As the holiday was originally celebrated, it is the time of year where the veil between this living world and the spirit world is at its thinnest. It is also a time of harvest and celebration and final nourishment for the harsh winter months to come.
I went to my local Trader Joe's and found these beautiful dark purple dahlias:

And I thought they'd play off perfectly with the bright orange of pumpkins. I bought some "sugar pie" pumpkins, which are larger than those little tiny pumpkins and much smaller and therefore more table-friendly than the big carving ones. And a bonus: I can roast them after the party for a hearty pumpkin soup! I also had some fall-colored leaves that were painted with gold glitter that I intertwined on the table. You can buy lots of these kinds of leaves in lots of different colors and themes from Michael's. And then I put the dahlias in clear tall vases to add height to the table, flanking a basket of apples. The interplay between the sticks in the basket and leaves and the "live" flowers and pumpkins and apples I thought balanced out the Halloween/Samhain theme well.

I liked the idea of having the dark wood on the table exposed. I grew up always having to have a tablecloth underneath. I think not! I love having chargers act like individual table cloths. So each place setting had a simple gold charger and silverware and beige cloth napkin. Using cloth napkins as opposed to paper ones (even if they are "themed"!) adds a sense of warmth to the table and the dining experience. I'm not opposed to using paper napkins on a daily basis, but I think using cloth ones make a dinner like this more special.
And don't forget to decorate around the table too! But keep it simple! We used our fireplace as part of the celebration by keeping a fire during the whole dinner. This was our "bonfire" like the ancient Celts used to have on this special day. And atop the fireplace was a simple garland of black leaves, glass pumpkins and votive candles. That's it. The focal point in the room was still the table, but by simply decorating the room around it also gives a feeling of warmth and celebration also.

And on to the FOOD!
We started off with a Pumpkin Soup. I devised a super-simple pumpkin soup recipe that can be whipped up in no time. And you can make it the day before too! Personally I'm not a fan of bland squash soups; I like to taste the butternut squash or pumpkin, but I do like some flavor in there too. This recipe borrows some Southwestern flavors to create a very warm soup that is sure to warm your bones on a cold Halloween night. For the tasting, not to overwhelm my guinea pigs, I served the soup in cappuccino cups. With a dollop of creme fraiche to cool off the slightly spicy soup and toasted pepitas, it was a big success:

Everyone got seconds.
Next course was an Autumn Salad. Arugula tossed with a fig-balsamic dressing, dried cranberries and topped with pine-nut crusted goat cheese balls. The salad was supposed to have sliced pears as well, but my nerves got the best of me and I forgot to include them!

There's a lesson in that. I totally didn't remember the pears until the next day. And no one noticed. Everyone loved the salad. The moral of the story is not to panic...things will happen no matter how prepared or experienced you are. All you can control is to just go with the flow.
The main course for this menu was a Pork Roulade stuffed with a pear, shallot and rosemary stuffing, drizzled with a Fig-Port Reduction, and served with Roasted Root Vegetables:

The veggies I used were carrots, parsnips and sweet potatoes. The color combination was perfect for Halloween and fall, and when paired with the dark fig-port sauce, it was extremely pleasing to the eye and very indicative of the black/orange colors of Halloween. The sauce was extremely simple to make (only 5 ingredients!) and the pork was simple and can be prepared the night before and just roasted before guests arrive. This menu looks impressive, but in all seriousness takes no time to prepare! This was by far the most favorite part of the dinner across the board among my tasters. And the sauce could easily transfer to a roasted chicken or even a chicken-roulade with the same stuffing if pork is not your favorite. Everyone loved the roasted root vegetables too. And some people remarked how the loved parsnips, despite it being their first time trying it!
For dessert we had a traditional Bambrack, a spiced fruit cake. I updated the traditional Irish recipe by adding mixed dried fruits (a combination of dried cherries, cranberries, golden raisins, and blueberries) and steeping them in Indian black tea, dark brown sugar, and adding candied ginger for a nice background spice. Add 3 cups of flour and 2 eggs, some spices and then bake off! Bambrack was the original Halloween "candy" that was given out to children dressed up in costumes and masks who visited neighbors on All Hallow's Eve. Although fruit cake isn't anyone's favorite dessert, this was impressed some of the guests and "...is the only fruitcake I'll ever eat."

Flaky buttery crust, apples tossed in brandy, orange zest and brown sugar with a touch of cinnamon, topped with crystallized sugar...what's not to love? I loved this. It was a perfect ending to a hearty fall meal. And served with mulled cider that got the house smelling nice of spice (which is a trick and much less expensive than investing in those expensive fragrant candles!)

Everyone got seconds.
Next course was an Autumn Salad. Arugula tossed with a fig-balsamic dressing, dried cranberries and topped with pine-nut crusted goat cheese balls. The salad was supposed to have sliced pears as well, but my nerves got the best of me and I forgot to include them!

There's a lesson in that. I totally didn't remember the pears until the next day. And no one noticed. Everyone loved the salad. The moral of the story is not to panic...things will happen no matter how prepared or experienced you are. All you can control is to just go with the flow.
The main course for this menu was a Pork Roulade stuffed with a pear, shallot and rosemary stuffing, drizzled with a Fig-Port Reduction, and served with Roasted Root Vegetables:

The veggies I used were carrots, parsnips and sweet potatoes. The color combination was perfect for Halloween and fall, and when paired with the dark fig-port sauce, it was extremely pleasing to the eye and very indicative of the black/orange colors of Halloween. The sauce was extremely simple to make (only 5 ingredients!) and the pork was simple and can be prepared the night before and just roasted before guests arrive. This menu looks impressive, but in all seriousness takes no time to prepare! This was by far the most favorite part of the dinner across the board among my tasters. And the sauce could easily transfer to a roasted chicken or even a chicken-roulade with the same stuffing if pork is not your favorite. Everyone loved the roasted root vegetables too. And some people remarked how the loved parsnips, despite it being their first time trying it!
For dessert we had a traditional Bambrack, a spiced fruit cake. I updated the traditional Irish recipe by adding mixed dried fruits (a combination of dried cherries, cranberries, golden raisins, and blueberries) and steeping them in Indian black tea, dark brown sugar, and adding candied ginger for a nice background spice. Add 3 cups of flour and 2 eggs, some spices and then bake off! Bambrack was the original Halloween "candy" that was given out to children dressed up in costumes and masks who visited neighbors on All Hallow's Eve. Although fruit cake isn't anyone's favorite dessert, this was impressed some of the guests and "...is the only fruitcake I'll ever eat."
I also served a simple Apple Crostada:

Flaky buttery crust, apples tossed in brandy, orange zest and brown sugar with a touch of cinnamon, topped with crystallized sugar...what's not to love? I loved this. It was a perfect ending to a hearty fall meal. And served with mulled cider that got the house smelling nice of spice (which is a trick and much less expensive than investing in those expensive fragrant candles!)
All in all, I scored high marks from my friends on the taste scale and think with a slight tweak here and there (and not forgetting to include the pears in the salad!), this is a great menu. It's wonderful all together for a festive dinner party feast, or taken apart for week night meals. If you love the soup, make a big batch and serve it with fresh bread for a hearty, warm dinner on a cold night. Looking for a side dish for a roasted chicken or even grilled steak? Try the roasted root veggies! Want a salad for lunch or brunch? Make a bigger batch of the Autumn Salad and do our Butternut Squash Ravioli recipe from our Harvest Party menu. The point is you can take out and add in as you like to create your own culinary experience. These are just our suggestions and pairings for a full one dinner. And of course, add a bottle of syrah and it's a great way to stay in on a Saturday night for a romantic date night. (winks)
You Asked, I Answer: Onionless Roast Dinner
Wednesday, October 28, 2009
My friend Rogers has a terrible affliction. He's allergic to onions (!). That means no Vidalias, no leeks, no wonderful sauteed or caramelized goodness for him. This presents a bit of a culinary challenge, since onions are often the base for many dishes. Diced small alongside carrots and celery, it helps form the mirapoire which is the base of most French cooking. In the south (where he's from), the carrots are substituted with green bell pepper to make "the trinity" which is the base for all gumbos and jambalaya. Nope, my friend can't even eat the milder shallot so that means no oysters with mignonette sauce for him, and he even skips out on the chives garnish for a traditional baked potato.
Rogers asked me for some recipes for when he comes home from Iraq in a week. Admittedly, I'm sort of an onion fan myself, so I looked through all my books to see what I could find to help him out. Emeril was out, but good old Ina Garten comes through in a pinch. Here's her recipe from her Barefoot Contessa Family Style cookbook for a standing rib roast with accompanying mustard horseradish sauce (or stilton sauce), and my recipe follows for simple and delicious roasted herbed potatoes. Add a bottle of cabernet and you've got yourself one hell of a Welcome Home meal.
Sunday Rib Roast (as featured in Barefoot Contessa Family Style)
1 3-rib standing rib roast (7-8 pounds)
1 Tbsp kosher salt
1.5 tsp freshly ground black pepper
Two hours before roasting, remove the meat from the refrigerator and allow it to come to room temperature.
Preheat the oven to 500 degrees. Place the oven rack on the second lowest position.
Place the roast in a pan large enough to hold it comfortably, bones side down, and spread the top thickly with the salt and pepper. Roast the meat for 45 minutes. Without removing the meat from the oven, reduce the oven temperature to 325 degrees and roast for another 30 minutes. Finally, increase the temperature to 450 degrees and roast for another 15-30 minutes, until the internal temperature of the meat is 125 degrees. (Be sure the thermometer is exactly in the center of the roast.) The total cooking time will be between 1.5 and 1 3/4 hours.
Remove the roast from the oven and transfer it to a cutting board. Cover it tightly with aluminum foil and allow the meat to rest for 20 minutes. Carve and serve with the sauce.
Mustard Horseradish Sauce (as featured in Barefoot Contessa Family Style)
1.5 cups good mayonnaise
3 Tbs Dijon mustard
1.5 Tbs whole grain mustard
1 Tbs prepared horseradish
1/3 cup sour cream
1/4 tsp kosher salt
Whisk together the mayo, mustards, horseradish, sour cream, and salt in a small bowl. Serve at room temperature.
Oven Roasted Herbed Potatoes
20 small new potatoes (gold or red)
2 Tbs olive oil
kosher salt
freshly ground black pepper
1 Tbs fresh rosemary sprigs, chopped
4 sprigs thyme, leaves removed
3 large cloves of garlic, minced
Preheat oven to 400 degrees.
Scrub the potatoes to remove an dirt and pat dry with a paper towel. In a large bowl, toss the potatoes with the olive oil and sprinkle generously with salt and pepper to taste. Place on a baking sheet and spread out evenly. Roast in oven until potatoes are tender and can be pierced easily with a fork or toothpick, 30 - 45 minutes. The cooking time will depend on the size of the potatoes; larger potatoes will take longer to cook than smaller ones. When done, remove and place potatoes back into the bowl they were tossed with the olive oil in. With the potatoes still hot, add the herbs and garlic and another light drizzle of olive oil and toss to coat. Serve.
My Notes: When choosing potatoes, choose them the same size so they will all cook evenly. You don't want a tiny potato burning while the huge one next to it is still cooking. Also, you can cut larger potatoes in half or even quarters to get an even size. I like using gold "new" potatoes. They look like this:

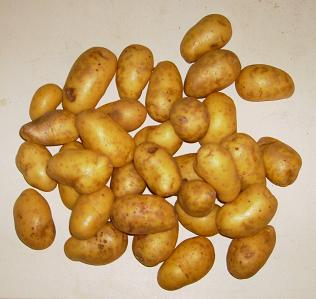 They usually come in red or gold as seen above. You choose one or the other, or do a combination of both which is really pleasing to the eye.
Rogers asked me for some recipes for when he comes home from Iraq in a week. Admittedly, I'm sort of an onion fan myself, so I looked through all my books to see what I could find to help him out. Emeril was out, but good old Ina Garten comes through in a pinch. Here's her recipe from her Barefoot Contessa Family Style cookbook for a standing rib roast with accompanying mustard horseradish sauce (or stilton sauce), and my recipe follows for simple and delicious roasted herbed potatoes. Add a bottle of cabernet and you've got yourself one hell of a Welcome Home meal.
Sunday Rib Roast (as featured in Barefoot Contessa Family Style)
1 3-rib standing rib roast (7-8 pounds)
1 Tbsp kosher salt
1.5 tsp freshly ground black pepper
Two hours before roasting, remove the meat from the refrigerator and allow it to come to room temperature.
Preheat the oven to 500 degrees. Place the oven rack on the second lowest position.
Place the roast in a pan large enough to hold it comfortably, bones side down, and spread the top thickly with the salt and pepper. Roast the meat for 45 minutes. Without removing the meat from the oven, reduce the oven temperature to 325 degrees and roast for another 30 minutes. Finally, increase the temperature to 450 degrees and roast for another 15-30 minutes, until the internal temperature of the meat is 125 degrees. (Be sure the thermometer is exactly in the center of the roast.) The total cooking time will be between 1.5 and 1 3/4 hours.
Remove the roast from the oven and transfer it to a cutting board. Cover it tightly with aluminum foil and allow the meat to rest for 20 minutes. Carve and serve with the sauce.
Mustard Horseradish Sauce (as featured in Barefoot Contessa Family Style)
1.5 cups good mayonnaise
3 Tbs Dijon mustard
1.5 Tbs whole grain mustard
1 Tbs prepared horseradish
1/3 cup sour cream
1/4 tsp kosher salt
Whisk together the mayo, mustards, horseradish, sour cream, and salt in a small bowl. Serve at room temperature.
Oven Roasted Herbed Potatoes
20 small new potatoes (gold or red)
2 Tbs olive oil
kosher salt
freshly ground black pepper
1 Tbs fresh rosemary sprigs, chopped
4 sprigs thyme, leaves removed
3 large cloves of garlic, minced
Preheat oven to 400 degrees.
Scrub the potatoes to remove an dirt and pat dry with a paper towel. In a large bowl, toss the potatoes with the olive oil and sprinkle generously with salt and pepper to taste. Place on a baking sheet and spread out evenly. Roast in oven until potatoes are tender and can be pierced easily with a fork or toothpick, 30 - 45 minutes. The cooking time will depend on the size of the potatoes; larger potatoes will take longer to cook than smaller ones. When done, remove and place potatoes back into the bowl they were tossed with the olive oil in. With the potatoes still hot, add the herbs and garlic and another light drizzle of olive oil and toss to coat. Serve.
My Notes: When choosing potatoes, choose them the same size so they will all cook evenly. You don't want a tiny potato burning while the huge one next to it is still cooking. Also, you can cut larger potatoes in half or even quarters to get an even size. I like using gold "new" potatoes. They look like this:
They usually come in red or gold as seen above. You choose one or the other, or do a combination of both which is really pleasing to the eye. If making both of these recipes, you should do them in separate ovens if possible. If not, then make the potatoes a head of time before you put the rib roast in the oven. Then while the rib roast is resting for 20 minutes, return the potatoes to their sheet pan, cover with aluminum foil and let warm in a 300 degree oven until you carve the roast. By that point the potatoes will be nice and hot again and the roast will be perfect serving temperature as well.
I made this rib roast recipe for Christmas last year and it came out beautifully. I made it for just Andrew and I, and had a huge amount left over. If you go to a butcher, you can ask them to cut the rib roast in half or even by rib to accommodate the amount you need. So if you're serving 6 people, you might want a 4-6 rib roast which is about a third of the size of a 7-8 pounder this recipe calls for. Don't be afraid to ask your butcher to help you out! That's why they're there!
Kid Tested, Toddler Approved: Cati's Favorite Pesto Pizza
Tuesday, October 27, 2009
Sometimes I crave something different than a regular tomato sauce pizza. I've found pesto will do the trick just perfectly. I developed this recipe based off of my daughter's favorite pizza toppings. It passes her picky palate, so I'm sure it will yours as well. And with some store-bought help, it's a Mommy Friendly recipe too.
Cati's Favorite Pesto Pizza
1 store-bought wheat pizza dough (recommended: Trader Joe's)
4-5 Tbsp good pesto (store-bought recommended: Trader Joe's)
1 large grilled chicken breast, cut into bite-sized chunks
4-5 asparagus, trimmed and cut into thirds
1/4 medium red onion, thinly sliced
2 Tbsp sun-dried tomatoes (in olive oil), drained
1 garlic clove, minced
1 container marinated bocconcini or 1 whole buffalo mozzarella cut into 1/2 inch slices
extra virgin olive oil
Preheat oven to 450 degrees.
Take out pizza dough from refrigerator and let stand about 20 minutes on counter to come to room temperature. Do this while the oven is pre-heating.
Meanwhile, prepare the pizza toppings. If using a fresh chicken breast, season it liberally with salt and black pepper and drizzle enough olive oil to lightly coat. Grill on gas grill or grill pan inside until cooked. Don't worry if it's just under cooked; it will finish cooking on top of the pizza. In a small mixing bowl, toss the sun-dried tomatoes, asparagus pieces and onion so the asparagus and onion can get coated in some of that seasoned olive oil. Set aside.
To Make Pizza:
At this point, you can either cut the dough into four separate pieces and make 4 individual pizzas or use the whole dough for one large pizza. The cooking time will stay the same regardless, so this is totally up to you. If making one large pizza, then gently stretch out the dough with a rolling pin or your hands until it reaches the size of your pizza stone or baking sheet. Remember, pizza doesn't have to always be round! If you don't have a pizza stone, then use a baking sheet and just make a rectangular pizza instead of a round one. If making individual pizzas, apply the same logic. Whatever shape and size you decide on, the pizza should be around 1/4 inch thick and I like to leave a slightly thicker border around to help keep all the toppings on the pizza instead of spilling over the sides during cooking.
Once you've achieved your pizza or pizzas, then spoon desired amount of pesto on top and spread evenly. Remember that pesto has considerably more olive oil than marinara, so although you do want enough to taste, be careful not to put too much which will yield a soggy pizza. After you've spread the pesto, then sprinkle on the chicken pieces, sun-dried tomatoes and asparagus, minced garlic, and dot around with the mozzarella. I like to give the pizzas a small drizzle of good quality extra virgin olive oil on top and then bake in oven for 15-20 minutes, depending on oven and desired crispiness.
When done, take the pizzas out and let stand 3 minutes so the cheese can set. Then cut into pieces and serve immediately!
My Notes:
If using a baking sheet, then line first with parchment paper for easy removal. Otherwise, any cheese that melts over will get stuck and it's hard to clean the baking sheet unless you do it immediately.
These are just toppings our family enjoys. You can substitute the asparagus with broccoli, zucchini, or any green vegetable! The pizza can be just as delicious with shrimp instead of chicken. Don't like onions or garlic? Omit it! If you have some wonderful in-season cherry tomatoes, feel free to substitute them instead of the sun-dried ones. Just be sure to cut them in half and give a quick pat with paper towel to remove some of the moisture so you don't have a soggy pizza.
The toppings can be made in advance, but don't roll out the pizza dough until before you're ready to cook it -- otherwise it will get tough and not be as tasty.
Avocados and Easy Guacamole
Monday, October 26, 2009
One of my biggest pet peeves is when guacamole doesn't taste or resemble guacamole anymore. By definition, it is supposed to be mashed avocados, lightly seasoned or enhanced. The avocado taste and texture should never be compromised in my opinion. When you're adding onions and tomatoes and cilantro and garlic and lime juice and spices, I think you're on your way to making a lovely salad. But it's not guacamole. Sorry.
I make 2 main kinds of guacamole. One is smokier and has a deeper flavor because I use cumin and oregano. The other is a very simple version that really lets an in-season ripe avocado shine.
This is my Easy Guacamole recipe.
The most important thing you can do is find good ripe avocados! I always (and I mean always) use the Haas avocados. They are smaller with dark green skins that turn a deep purple when overly ripe:

Notice how in the above picture, the skin of the avocado is dark green. It's not bright green, not purple. But a lovely shade of dark green. That's what you want.
Some markets will offer larger avocados. You might be tempted to get those thinking you're getting more value for your buck. And I suppose you are, but you are definitely sacrificing flavor. They have little to no actual avocado flavor and end up being a total waste of your money.
Telling an avocado is ripe is also important for a good guacamole. You don't want it too ripe or else it tastes old and gives an overall funky almost yeasty smell and taste. It's not pleasant. You also don't want it under ripe because then you won't be able to mash it to get that perfect creamy consistency.
So how can you tell if this avocado is ready to be glorified? Here's my list:
Color
The avocado needs to be dark green. Bright green means it's under ripe. Dark purple means it's overripe. You want it dark green for the optimal guacamole avocado.
Feel
I never, ever squeeze fruit or vegetables. All it does is bruises an otherwise perfect ingredient. Instead, I smell them. If it smells like a tomato or peach, then by God it's a tomato or peach ready to be eaten! But unfortunately you can't really do that with avocados. The color will give you a great indication of how far along the avocado is on the ripeness spectrum. But I've found I still need to give a gentle squeeze. And I do mean gentle squeeze. Hold the avocado in your hand, and using your pinky finger (because it's the weakest), see if you can press into the avocado and if the avocado gives a little. Don't press hard - you don't want to puncture it! If it's rock hard, it's under ripe. If it's almost like clay, then it's overripe. You want the give to be just enough so that you can squeeze it with your pinky finger. If you can't with your pinky but can with your thumb, then it's a perfect stage to use cut into chunks in a salad. But remember, you want the avocado a little riper for guacamole.
Smell
Avocados don't really "smell." They don't have an identifiable fragrance as does say a peach or strawberry or pineapple. But, when the avocado is past it's peak, it will give off an unpleasant smell. This is the oxidation that's going on inside of avocado - the flesh is starting to rot away around the pit and move out towards the skin. Almost always the avocado is also at a purple color stage and also very soft, but not always. It may still appear dark green and have enough "push back" so it can fool you. But if you smell something funky, that means it's been bruised in some way and air has gotten in and is rotting it from inside out. You don't want to pay the "2 for $3" and go home to find you can't make guacamole because the avocado is rotting inside. So give it a whiff before you leave. You want to smell nothing.
Like most recipes, a dish is only as good as its ingredients. Do take the time to check out and carefully select your avocados before making guacamole. I promise you, it will make all the difference in the world. And never use any part of the avocado if it is bruised or oxidized in any way; even though it may look fine to eat, that peculiar taste and smell has permiated throughout the entire avocado and will ruin your dish.
Now that you know how to select the perfect avocado, let's make something with it!
Here's my recipe for Easy Guacamole. The most important part is selecting the best avocados, so if you can do that, then you're 90% on your way.
Easy Guacamole
4-5 ripe Haas avocados
1 garlic clove, peeled and finely minced
2 limes, juiced
kosher salt
freshly ground black pepper
Cut each avocado in half and remove the pit. Using a spoon, trace around the skin of the avocado and scoop out the flesh into a bowl. Do not worry about getting it all out in one perfect piece; in fact, scoop it out in 3 or 4 pieces! Using a spoon or fork, gently mash the avocado against the side of the bowl, starting from the middle and pulling your fork or spoon to the sides of the bowl. Do not overmash into a puree, but do it enough to make a nice smooth and chunky consistency. Add the garlic and lime juice. Sprinkle with salt to taste and black pepper. Mix and serve immediately.
Trick: to avoid browning of the guacamole, leave one of the avocado pits inside.
Serving suggestion: I love serving it with blue corn tortilla chips. I think it looks nice together and the blue corn gives a smoother flavor. Also can be used on burgers, sandwiches, etc.
I make 2 main kinds of guacamole. One is smokier and has a deeper flavor because I use cumin and oregano. The other is a very simple version that really lets an in-season ripe avocado shine.
This is my Easy Guacamole recipe.
The most important thing you can do is find good ripe avocados! I always (and I mean always) use the Haas avocados. They are smaller with dark green skins that turn a deep purple when overly ripe:
Notice how in the above picture, the skin of the avocado is dark green. It's not bright green, not purple. But a lovely shade of dark green. That's what you want.
Some markets will offer larger avocados. You might be tempted to get those thinking you're getting more value for your buck. And I suppose you are, but you are definitely sacrificing flavor. They have little to no actual avocado flavor and end up being a total waste of your money.
Telling an avocado is ripe is also important for a good guacamole. You don't want it too ripe or else it tastes old and gives an overall funky almost yeasty smell and taste. It's not pleasant. You also don't want it under ripe because then you won't be able to mash it to get that perfect creamy consistency.
So how can you tell if this avocado is ready to be glorified? Here's my list:
Color
The avocado needs to be dark green. Bright green means it's under ripe. Dark purple means it's overripe. You want it dark green for the optimal guacamole avocado.
Feel
I never, ever squeeze fruit or vegetables. All it does is bruises an otherwise perfect ingredient. Instead, I smell them. If it smells like a tomato or peach, then by God it's a tomato or peach ready to be eaten! But unfortunately you can't really do that with avocados. The color will give you a great indication of how far along the avocado is on the ripeness spectrum. But I've found I still need to give a gentle squeeze. And I do mean gentle squeeze. Hold the avocado in your hand, and using your pinky finger (because it's the weakest), see if you can press into the avocado and if the avocado gives a little. Don't press hard - you don't want to puncture it! If it's rock hard, it's under ripe. If it's almost like clay, then it's overripe. You want the give to be just enough so that you can squeeze it with your pinky finger. If you can't with your pinky but can with your thumb, then it's a perfect stage to use cut into chunks in a salad. But remember, you want the avocado a little riper for guacamole.
Smell
Avocados don't really "smell." They don't have an identifiable fragrance as does say a peach or strawberry or pineapple. But, when the avocado is past it's peak, it will give off an unpleasant smell. This is the oxidation that's going on inside of avocado - the flesh is starting to rot away around the pit and move out towards the skin. Almost always the avocado is also at a purple color stage and also very soft, but not always. It may still appear dark green and have enough "push back" so it can fool you. But if you smell something funky, that means it's been bruised in some way and air has gotten in and is rotting it from inside out. You don't want to pay the "2 for $3" and go home to find you can't make guacamole because the avocado is rotting inside. So give it a whiff before you leave. You want to smell nothing.
Like most recipes, a dish is only as good as its ingredients. Do take the time to check out and carefully select your avocados before making guacamole. I promise you, it will make all the difference in the world. And never use any part of the avocado if it is bruised or oxidized in any way; even though it may look fine to eat, that peculiar taste and smell has permiated throughout the entire avocado and will ruin your dish.
Now that you know how to select the perfect avocado, let's make something with it!
Here's my recipe for Easy Guacamole. The most important part is selecting the best avocados, so if you can do that, then you're 90% on your way.
Easy Guacamole
4-5 ripe Haas avocados
1 garlic clove, peeled and finely minced
2 limes, juiced
kosher salt
freshly ground black pepper
Cut each avocado in half and remove the pit. Using a spoon, trace around the skin of the avocado and scoop out the flesh into a bowl. Do not worry about getting it all out in one perfect piece; in fact, scoop it out in 3 or 4 pieces! Using a spoon or fork, gently mash the avocado against the side of the bowl, starting from the middle and pulling your fork or spoon to the sides of the bowl. Do not overmash into a puree, but do it enough to make a nice smooth and chunky consistency. Add the garlic and lime juice. Sprinkle with salt to taste and black pepper. Mix and serve immediately.
Trick: to avoid browning of the guacamole, leave one of the avocado pits inside.
Serving suggestion: I love serving it with blue corn tortilla chips. I think it looks nice together and the blue corn gives a smoother flavor. Also can be used on burgers, sandwiches, etc.
Cranberry Pineapple Salsa
For Trajan's birthday party I also wanted to do a seasonal salsa. Considering tomatoes are now out of season, when I saw this recipe in Gourmet that used fall flavors and colors, I jumped at the chance to try it out. Although when I do it again I'll add some changes, enough people liked it and wanted the recipe, so here you go!
Cranberry Pineapple Salsa
1 pineapple, peeled, cored and cut into 1/2 inch pieces
1 medium onion, chopped
1 Tbsp vegetable oil
1 (12 oz bag) fresh cranberries (not frozen!)
1/3 cup packed dark brown sugar
1/4 cup Seville orange juice (or 2 Tbsp each of fresh lime and regular orange juice)
1 cup packed cilantro sprigs, coarsely chopped
Preheat oven to 450 degrees with rack in upper third.
Toss pineapple and onion with oil and 1/2 tsp salt in a large sheet pan and roast, stirring occasionally until charred in spots, about 40 minutes to an hour.
Meanwhile, pulse the cranberries in a food processor until coarsely chopped. Transfer to a large bowl and stir in 1/3 cup brown sugar.
Add hot roasted pineapple mixture stirring until sugar has dissolved, then stir in citrus juice. Season with brown sugar and salt. Cool, then stir in cilantro. Let stand covered 1 hour.
My Notes:
I grilled the pineapple and found that to be an easier and less messy way to achieve the desired charred and caramelized effect. If you grill the pineapple, do not core it; just slice it into 1 inch thick slices and brush with vegetable oil. Grill on high heat until char marks. Let cool slightly before cutting (make sure you cut out that core!!)
I also used raw onions, but did not like how intense the flavor was. I definitely will do this again with oven-roasted or grilled onions.
The cranberries I thought were an awesome addition of sour to this salsa. I loved the color, the texture, and the flavor they gave to the whole dish. I liked how they played against the caramelized pineapple. Just make sure you don't pulse them too much; you want a rough chop, not a fine mince!
Clementine Jicama Salad
For Trajan's birthday party, I decided to do southwestern flavors because that's his favorite. A few of you loved the recipes, so I'm sharing via the blog of course. This one is a great fall salad that offers the crisp, light flavors you usually crave during summer months. I love it because it's a welcomed departure from the usual suspects of fall (apples, cinnamon, squash). I snagged this recipe from Gourmet magazine's Thanksgiving issue of last year (2008).
Clementine Jicama Salad
1/2 tsp chopped garlic
1/4 cup fresh lime juice
6 Tbsp olive oil
1/2 tsp sugar
8 clementines, peeled and cut crosswise into 1/4 inch thick slices
1 lb jicama, peeled and cut into 1/4 inch thick matchsticks
1 small red onion, thinly sliced
3/4 cup packed cilantro sprigs
1/2 cup crumbled queso fresco or mild feta
1/3 cup raw green (hulled) pumpkin seeds, toasted
Mince and mash garlic to a paste with 1/2 tsp salt, then whisk together with lime juice, oil, sugar and 1/2 tsp pepper in a large bowl.
Just before serving, add clementines, jicama, onion and cilantro and gently toss. Season with salt. Sprinkle with cheese and pumpkin seeds.
My Notes:
Clementines are a late-fall/winter fruit, so if you're doing this recipe in September or October, you're not going to find clementines. You can substitute oranges (Valencia oragnes are my favorite because they're sweeter) or even a can of drained mandarin oranges. If using the Valencia oranges (or any orange for that matter), cut back on the lime juice by half and do a full tsp of sugar in order to balance out the sweetness to tartness. Clementines themselves are very sweet and have a lovely honey taste to them, so make sure you taste your oranges before hand to gage how sweet or sour they are and balance out with sugar (or honey!) accordingly.
I used honey instead of sugar when I made this recipe. Since I couldn't find clementines, I used Valencia oranges and added a tablespoon of orange honey to the vinaigrette to balance out that sweetness.
The recipe calls to leave the cilantro sprigs on the stem and leaves whole. If you love cilantro (which I personally do), then do that. If not, or if making for guests, then take the cilantro off the stems and give a rough chop so the flavor isn't as intense.
I made the components of the salad (jicama, oranges, cilantro and onion) a head of time and stored in a bowl in the fridge for 5 hours before, and made the vinaigrette seperately. Then I tossed it all together and garnished before serving. This is a great recipe for a party or Make Ahead.
The queso fresco should be grated if using, and if using feta, then crumble it with your fingers.
A Return To Serious Food Blogging
A lot of my blogging time is spent on my other blog, A Mishy's Perspective. I promise now that a few things have settled down, I will post more on this food blog and recipe share. I'm also happy to report great positive feedback from people who've checked out this blog, so if you have friends and family that are into food and cooking, please do forward it on to them! My hopes is to build a cooking community where we can all share recipes, learn few things about food, different cultures and celebrations, and just have fun!
Eventually I am going to create a whole independent website for Enchanted Spoon so people can buy the new cookbook. In case you haven't heard, my friend Chandra and I are writing a cookbook on seasonal entertaining -- using seasonal ingredients to create wonderful menus to celebrate holidays, feasts, and the wonders each season have to give us. We're in the "testing recipes" stage now, and hope to have the book out next summer.
Until then, I plan to update this blog more frequently, so check often and pass on the word! And comments and advice on what you'd like to see more of, less of, what topics you'd like discussed or questions answered are always welcome!!
Best Chocolate Cake Ever!
For Trajan's 1st Birthday party this past weekend, I used Ina Garten's recipe for Beatty's Chocolate Cake and it was a huge hit. I got so many people asking for the recipe, that I decided to just post it on my blog. So enjoy!
For the Cake:
Butter, for greasing the pans
1 3/4 cups all-purpose flour, plus more for pans
2 cups sugar
3/4 cups good cocoa powder
2 teaspoons baking soda
1 teaspoon baking powder
1 teaspoon kosher salt
1 cup buttermilk, shaken
1/2 cup vegetable oil
2 extra-large eggs, at room temperature
1 teaspoon pure vanilla extract
1 cup freshly brewed hot coffee
Directions:
Preheat the oven to 350 degrees F.
Butter 2 (8-inch) round cake pans. Line with parchment paper, then butter and flour the pans.
Sift the flour, sugar, cocoa, baking soda, baking powder, and salt into the bowl of an electric mixer fitted with a paddle attachment and mix on low speed until combined. In another bowl, combine the buttermilk, oil, eggs, and vanilla. With the mixer on low speed, slowly add the wet ingredients to the dry. With mixer still on low, add the coffee and stir just to combine, scraping the bottom of the bowl with a rubber spatula. Pour the batter into the prepared pans and bake for 35 to 40 minutes, until a cake tester comes out clean. Cool in the pans for 30 minutes, then turn them out onto a cooling rack and cool completely.
Place 1 layer, flat side up, on a flat plate or cake pedestal. With a knife or offset spatula, spread the top with frosting. Place the second layer on top, rounded side up, and spread the frosting evenly on the top and sides of the cake.
Chocolate Frosting:
6 ounces good semisweet chocolate (recommended: Callebaut)
1/2 pound (2 sticks) unsalted butter, at room temperature
1 extra-large egg yolk, at room temperature
1 teaspoon pure vanilla extract
1 1/4 cups sifted confectioners' sugar
1 tablespoon instant coffee powder
Chop the chocolate and place it in a heat-proof bowl set over a pan of simmering water. Stir until just melted and set aside until cooled to room temperature.
In the bowl of an electric mixer fitted with a paddle attachment, beat the butter on medium-high speed until light yellow and fluffy, about 3 minutes. Add the egg yolk and vanilla and continue beating for 3 minutes. Turn the mixer to low, gradually add the confectioners' sugar, then beat at medium speed, scraping down the bowl as necessary, until smooth and creamy. Dissolve the coffee powder in 2 teaspoons of the hottest tap water. On low speed, add the chocolate and coffee to the butter mixture and mix until blended. Don't whip! Spread immediately on the cooled cake.
My notes: I can't find Callebaut chocolate so I use Ghirardelli semi-sweet chocolate chips and Hershey's unsweetened cocoat powder. Make sure you are using unprocessed cocoa powder and not granulated chocolate (Ghiradelli makes this and it's wonderful for hot cocoa but not for baking!). Teh granulated chocolate will give a sandy texture and taste to your frosting and cake, which is not pleasant.
Kid Tested, Toddler Approved: Child Proof Meatloaf!
Thursday, October 8, 2009
For some reason, my daughter Ecaterina does not like ground anything. This means no burgers, no chili, no sloppy joes or lettuce cups. And this presents a bit of a problem considering meatloaf is one of the most mommy-friendly dinners to prepare.
I grew up a kid of immigrant parents. That means we never had meatloaf. My grandma made once something like meatloaf, but it had boiled eggs in it and was...weird. I never really had meatloaf before until I was an adult, and curiosity peeked, I tried making it myself! Well, predictably, it was dry and bland and I could see why my parents never jumped on the meatloaf bandwagon. But then I had it a few years later at a restaurant and it was moist and flavorful and delicious. Curiosity peeked again.
I've been tinkering with a few recipes for "meatloaf" using beef, turkey and chicken respectively, various spice blends and toppings to come up with an interesting yet traditional recipe that I can make for the whole family on a busy weekday. And finally last night -- SUCCESS! Even Ecaterina ate a big portion with no complaint.
I proudly give you:
Italian Style Turkey Meatloaf:
1 pound ground turkey
1 small white onion, diced small
1 Tbsp extra virgin olive oil
1/3 cup chicken broth
2 medium (or 1 extra large) egg, lightly beaten
2 large garlic cloves, minced
2 Tbsp sun-dried tomatoes in oil, roughly chopped
1 tsp fresh parsley, chopped
1 tsp fresh basil, chopped
1 tsp dried oregano
1 Tbsp Worcester sauce
1 Tbsp ketchup
2 Tbsp - 4 Tbsp Italian style dried breadcrumbs
kosher salt
freshly ground black pepper
For the topping:
1 cup ketchup
1 tsp Dijon mustard
2 heaping tsp brown sugar
1 Tbsp good balsamic vinegar
Preheat oven to 375 degrees.
Heat the olive oil in a saute pan, and saute the onions on medium heat until soft and translucent, about 10 minutes. When the onions are translucent, add the chicken stock and simmer until the liquid absorbs into the onions, creating like a saucy relish consistency. Remove from heat and allow to cool slightly.
While the onions cool, place room temperature ground turkey (having it room temperature will allow it to mix better) in a large mixing bowl. Add a good pinch of salt (about 1/2 tsp - 1 tsp) and some black pepper to taste (I like about 1/4 tsp when making for kids). Add the eggs, garlic, sun-dried tomatoes, parsley, basil, dried oregano, Worcester sauce, 1 Tbsp of ketchup and 2 Tbsp of the bread crumbs to start (you will add as needed, depending on how "wet" the onions are). Add the cooled onion mixture to the turkey and using your hands, mix well making sure to incorporate all the ingredients and distribute the egg evenly. But don't over mix! Mix just until all the ingredients come together.
Take a small amount of the mixture and try to form a ball like for a meatball. If the mixture feels too wet and cannot come together into a ball, but instead falls apart easily, you need to add more breadcrumbs. Add 1 Tbsp at a time until you get a wet and very moist consistency, but one that can just hold a form. If you make a mistake and add too much breadcrumbs and the mixture is dry and tough, add more chicken broth (cold) to the mixture until you get the right consistency. But truly, 2 Tbsp of dried breadcrumbs with maybe a pinch more should be just right.
Place the meat mixture into a loaf pan (no need to butter or spray) and spread out evenly on the top. Set aside. (At this point, if you plan to bake it later, cover with aluminum foil and refrigerate until ready to bake)
To make the topping, mix together the ketchup, mustard, brown sugar and balsamic vinegar in a small bowl. Spread evenly on top of the meatloaf mixture in the baking pan and then bake in oven for 45 minutes to an hour.
Start checking the meatloaf about 45 minutes into it. When the edges of the pan begin to caramelize (don't worry if it burns even just a little...that's the sugars of the topping caramelizing) and when you shake the pan and the meat doesn't giggle but instead stays firm, then you know it's ready.
Remove and let cool 5 minutes before slicing.
Serve with garlic-rosemary oven roasted potatoes and steamed broccolini.
September's Bounty
Wednesday, September 2, 2009
September. The gateway to autumn (and my favorite time of year). The weather is still pretty hot, but giving way to slightly cooler nights. If you live in the country, you can smell the husks in the air at dusk.
This is the height of the growing season for corn:

and tomatoes:

For only a few more weeks, we can enjoy the ripe sweet beauty of the scarlett fruit that yeilds to so many different dishes. Tomatoes right now are at their sweetest, and it is this batch that is preferred to be dried into sun-dried tomatoes. This is the best time to make a fresh pasta sauce from scratch, with just a few light-handed touches of good salt, some garlic, and the last of your garden's basil...it can be a beautifuil thing.
This is the height of the growing season for corn:
and tomatoes:
For only a few more weeks, we can enjoy the ripe sweet beauty of the scarlett fruit that yeilds to so many different dishes. Tomatoes right now are at their sweetest, and it is this batch that is preferred to be dried into sun-dried tomatoes. This is the best time to make a fresh pasta sauce from scratch, with just a few light-handed touches of good salt, some garlic, and the last of your garden's basil...it can be a beautifuil thing.
Corn is at it's sweetest now too. Although its peak production is August, the corn now has a sublte sweeter flavor to it. This is the time to cut the kernals off and do a quick saute with some good butter, salt and freshly ground black pepper. Then use the cobs to make a stock for corn chowder. Throw in some pieces of perfectly poached lobster and you have one hell of a meal.
Corn and tomatoes can go together as well. Make a salad with fresh corn kernals, ripe cherry tomatoes, a drizzle of a good extra virgin olive oil and some sea salt and pepper. Add a chiffonade of basil or some bright parsley for garnish if you so desire.
My father loves corn on the cob roasted on a mesquite bbq. The mesquite gives way to a caramelization that is so tasty (a little mess on the hands), and so good. Tomato salad with fleur de sell is wonderful, and now is a great time to make Panzanella -- a quick toss of fresh tomatoes, red onions, cucumbers and basil with day-old bread in a garlic-vinaigrette. It's wonderful and one of my favorite go-to sides for a roasted chicken in the summer.
This is also a great time to make your own fresh salsa. Tomatoes, red onions, scallions, garlic, fresh cilantro and all the jalepenos or serrano peppers you can handle can make a very quick and tasty Salsa Fresca.
Whether you have your own garden or visit the farmers' market, get some corn and tomatoes these next couple of weeks for one last time. It's not the same making corn on the cob in December, and the tomatos don't taste as good in that BLT in February.
And savory every last kernal.
Week Night Yum Yum: Best. Mediterranean Salad. Ever.
Wednesday, August 12, 2009
I love a good chopped salad in summer time. And I love Mediterranean flavors. I devised this recipe last night using the fresh produce I had and some canned beans I always keep in the pantry. The dressing makes it, with a great combination of sweet from the honey that balances out the sour of the lemon and vinegar. Add a good creamy feta cheese for saltiness and you have a wonderful, composed salad.
I know you'll enjoy it as much as we did.
 Mediterranean Salad with Sweet Balasmic Vinaigrette
1/2 red onion, finely chopped
2 large scallions, chopped
1 can garbanzo beans, drained and rinsed
5 ripe roma tomatoes, chopped
2 persian cucumbers, chopped
1/2 cup Greek or French feta cheese, cubed (recommend: Valbreso)
kosher salt
freshly ground black pepper
2 tbsp cilantro, roughly chopped
1 tsp fresh mint, roughly chopped
1/4 cup extra virgin olive oil
juice of 1/2 lemon
1 tbsp good balsamic vinegar
2 tbsp honey
1 large clove of garlic, minced
In a large bowl, combine the red onion, scallions, garbanzo beans, tomatoes, and cucumbers. Season with salt and pepper to taste. Set aside.
In a small bowl, whisk together the olive oil, lemon juice, balsamic vinegar, honey and garlic.
Pour the dressing over the vegetables and add the cilantro and mint. Combine very well, making sure everything is coated. Top with the feta cheese and serve.
Can be made a full day in advance. Serve cold or at room temperature. Add grilled chicken, salmon or shrimp for extra protein.
BTC Scones
Monday, July 27, 2009
Sweet and fruity scones are always a staple at my house, but sometimes we want something savory. These scones are savory, packed with flavor, and make a meal of themselves!


2 cups of all-purpose flour


2 cups of all-purpose flour
4 tsp baking powder
1/2 tsp kosher salt
1/4 tsp freshly ground black pepper
2 tsp granulated sugar
4 Tbsp cold butter, diced into cubes
2 Tbsp cold shortening
3/4 cup milk
1 egg
4 strips cooked bacon, roughly chopped
1 cup shredded white cheddar sun-dried tomato and basil cheese
Preheat oven to 400 degrees.
In a small bowl, combine flour, baking powder, salt, pepper and sugar. In the bowl of a standing mixer, hold a sifter over the bowl and sift the flour mixture through it and into the bowl. Attach the paddle attachment to the mixer and add the butter and shortening to the flour mixture. Mix on medium speed until butter is incorporated and mixture resembles crumbs the size of peas. Add the egg and milk and mix again until just combined. Add the bacon and cheese and mix again until all is combined well. Do not overmix!
Lay out a layer of parchment paper on a baking tray. Spoon a heaping tablespoon of the scone batter onto the tray. Don't worry about making perfectly rounded scones or if peaks develop; you want them to look rustic and homemade. Place them about 1-2 inches apart and make sure they are all about the same size to ensure even cooking among the scones. You should have 12-15 scones depending on their size.
Bake in oven for 16 mintues exactly. Tops will begin to golden. Remove and let cool slightly before serving.
Serve hot out of oven or at room temperature.
Caribbean Style Fish for a Hot Summer Night!
Tuesday, July 14, 2009
Caribbean-Spiced Grilled Red Snapper with Tropical "Salsa" and Tandoori-Spiced Shrimp

Sometimes, especially in the summer, I really crave tropical flavors. Caribbean food is wonderful if done right and hits all of my favorite notes in food: spice, depth, heat, color, freshness. It's earthy, soulful food without being heavy and consuming, and often is quick and easy to prepare.
We got some red snapper fillets this past weekend and I played around with my recipe. It's inspired by Jasper White's Summer Shack Cookbook, which if you do not own yet and love fish of any kind, must go get. Now. It's the bible of seafood cooking.
At any rate, here's the recipe:
For the Tropical Salsa:
1 ripe nectarine or yellow peach, chopped
1/3 cup fresh pineapple, chopped
2 scallions, chopped
1 jalepeno pepper, finely minced
1 garlic clove, finely minced
splash of lemon or lime juice
small pinch of kosher salt
couple of turns of freshly ground black pepper
In a bowl, combine all above ingredients and set aside for at least 1 hour to marinade. Serve chilled as a cold contrast to the hot grille fish. Can also add cilantro as a garnish if desired.
For the Snapper:
2 red snapper fillets, skins removed
2 tbsp vegetable oil
Quick Caribbean Spice Blend (recipe follows)
Take the fish and brush vegetable oil on both sides. Sprinkle desired amount of Caribbean seasoning. Set aside. (this can be done ahead of time and refrigerated even the night before, but the loner it stays, the more concentrated the spice flavors will be so use less if doing it further in advance).
On a high heat charcoal grill, place fish flesh side down and grill for 2 minutes on direct heat. Gently loosen with spatula and flip the fish over and grill other side another 2 minutes. Move to colder part of grill (the peripheries) and let finish cooking about 4 more minutes, depending on thickness of the fish. Remove and top immediately with the tropical salsa and shrimp.
Quick Caribbean Spice Blend
1/4 tsp allspice
1/4 tsp cayenne pepper
1/4 tsp chili powder
1/4 tsp ground ginger
1/4 tsp cinnamon
1/2 tsp brown sugar
pinch kosher salt
few turns of black pepper mill
Combine and season or place in storage container.
Tandoori-Spiced Grilled Shrimp
1 tsp tandoori paste (found in your import section of local supermarket)
1 heaping tbsp plain yogurt
1/2 pound shrimp, shell and tails on, cleaned and deveined if possible
Combine the tandoori paste and yogurt and set aside.
On a high heat grill, place shrimp on (with shells still on) and grill on both sides until just turning orange-pink in color. Remove promptly and take shells off, but leave tails on (this is easiest done with scissors). The shrimp will be half-cooked at this point. Brush the tandoori-yogurt mixture on the shrimp, and return them to the grill to finish cooking. When the shrimp are just firm to the touch and turn opaque, they are done. Remove them promptly, apply another coating of tandoori-yogurt and serve hot.
Serving Suggestions and Plating:
Plate a generous portion of white rice and black beans on the bottom of a plate. Place a red snapper fillet on top of that, and top with tropical salsa. Layer about 3 shrimp on top of that and serve hot with a margarita.
Subscribe to:
Posts (Atom)