You Asked, I Answer: Onionless Roast Dinner

Wednesday, October 28, 2009

My friend Rogers has a terrible affliction. He's allergic to onions (!). That means no Vidalias, no leeks, no wonderful sauteed or caramelized goodness for him. This presents a bit of a culinary challenge, since onions are often the base for many dishes. Diced small alongside carrots and celery, it helps form the mirapoire which is the base of most French cooking. In the south (where he's from), the carrots are substituted with green bell pepper to make "the trinity" which is the base for all gumbos and jambalaya. Nope, my friend can't even eat the milder shallot so that means no oysters with mignonette sauce for him, and he even skips out on the chives garnish for a traditional baked potato.

Rogers asked me for some recipes for when he comes home from Iraq in a week. Admittedly, I'm sort of an onion fan myself, so I looked through all my books to see what I could find to help him out. Emeril was out, but good old Ina Garten comes through in a pinch. Here's her recipe from her Barefoot Contessa Family Style cookbook for a standing rib roast with accompanying mustard horseradish sauce (or stilton sauce), and my recipe follows for simple and delicious roasted herbed potatoes. Add a bottle of cabernet and you've got yourself one hell of a Welcome Home meal.

Sunday Rib Roast (as featured in Barefoot Contessa Family Style)

1 3-rib standing rib roast (7-8 pounds)
1 Tbsp kosher salt
1.5 tsp freshly ground black pepper

Two hours before roasting, remove the meat from the refrigerator and allow it to come to room temperature.

Preheat the oven to 500 degrees. Place the oven rack on the second lowest position.
Place the roast in a pan large enough to hold it comfortably, bones side down, and spread the top thickly with the salt and pepper. Roast the meat for 45 minutes. Without removing the meat from the oven, reduce the oven temperature to 325 degrees and roast for another 30 minutes. Finally, increase the temperature to 450 degrees and roast for another 15-30 minutes, until the internal temperature of the meat is 125 degrees. (Be sure the thermometer is exactly in the center of the roast.) The total cooking time will be between 1.5 and 1 3/4 hours.
Remove the roast from the oven and transfer it to a cutting board. Cover it tightly with aluminum foil and allow the meat to rest for 20 minutes. Carve and serve with the sauce.


Mustard Horseradish Sauce (as featured in Barefoot Contessa Family Style)

1.5 cups good mayonnaise
3 Tbs Dijon mustard
1.5 Tbs whole grain mustard
1 Tbs prepared horseradish
1/3 cup sour cream
1/4 tsp kosher salt

Whisk together the mayo, mustards, horseradish, sour cream, and salt in a small bowl. Serve at room temperature.


Oven Roasted Herbed Potatoes

20 small new potatoes (gold or red)
2 Tbs olive oil
kosher salt
freshly ground black pepper
1 Tbs fresh rosemary sprigs, chopped
4 sprigs thyme, leaves removed
3 large cloves of garlic, minced


Preheat oven to 400 degrees.

Scrub the potatoes to remove an dirt and pat dry with a paper towel. In a large bowl, toss the potatoes with the olive oil and sprinkle generously with salt and pepper to taste. Place on a baking sheet and spread out evenly. Roast in oven until potatoes are tender and can be pierced easily with a fork or toothpick, 30 - 45 minutes. The cooking time will depend on the size of the potatoes; larger potatoes will take longer to cook than smaller ones. When done, remove and place potatoes back into the bowl they were tossed with the olive oil in. With the potatoes still hot, add the herbs and garlic and another light drizzle of olive oil and toss to coat. Serve.


My Notes: When choosing potatoes, choose them the same size so they will all cook evenly. You don't want a tiny potato burning while the huge one next to it is still cooking. Also, you can cut larger potatoes in half or even quarters to get an even size. I like using gold "new" potatoes. They look like this:

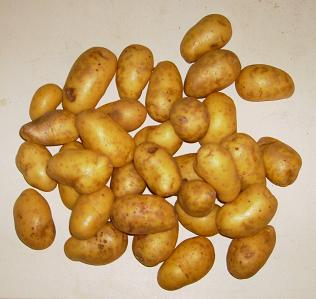
They usually come in red or gold as seen above. You choose one or the other, or do a combination of both which is really pleasing to the eye.
If making both of these recipes, you should do them in separate ovens if possible. If not, then make the potatoes a head of time before you put the rib roast in the oven. Then while the rib roast is resting for 20 minutes, return the potatoes to their sheet pan, cover with aluminum foil and let warm in a 300 degree oven until you carve the roast. By that point the potatoes will be nice and hot again and the roast will be perfect serving temperature as well.
I made this rib roast recipe for Christmas last year and it came out beautifully. I made it for just Andrew and I, and had a huge amount left over. If you go to a butcher, you can ask them to cut the rib roast in half or even by rib to accommodate the amount you need. So if you're serving 6 people, you might want a 4-6 rib roast which is about a third of the size of a 7-8 pounder this recipe calls for. Don't be afraid to ask your butcher to help you out! That's why they're there!

Kid Tested, Toddler Approved: Cati's Favorite Pesto Pizza

Tuesday, October 27, 2009

Sometimes I crave something different than a regular tomato sauce pizza. I've found pesto will do the trick just perfectly. I developed this recipe based off of my daughter's favorite pizza toppings. It passes her picky palate, so I'm sure it will yours as well. And with some store-bought help, it's a Mommy Friendly recipe too.


Cati's Favorite Pesto Pizza

1 store-bought wheat pizza dough (recommended: Trader Joe's)

4-5 Tbsp good pesto (store-bought recommended: Trader Joe's)

1 large grilled chicken breast, cut into bite-sized chunks

4-5 asparagus, trimmed and cut into thirds

1/4 medium red onion, thinly sliced

2 Tbsp sun-dried tomatoes (in olive oil), drained

1 garlic clove, minced

1 container marinated bocconcini or 1 whole buffalo mozzarella cut into 1/2 inch slices

extra virgin olive oil


Preheat oven to 450 degrees.


Take out pizza dough from refrigerator and let stand about 20 minutes on counter to come to room temperature. Do this while the oven is pre-heating.


Meanwhile, prepare the pizza toppings. If using a fresh chicken breast, season it liberally with salt and black pepper and drizzle enough olive oil to lightly coat. Grill on gas grill or grill pan inside until cooked. Don't worry if it's just under cooked; it will finish cooking on top of the pizza. In a small mixing bowl, toss the sun-dried tomatoes, asparagus pieces and onion so the asparagus and onion can get coated in some of that seasoned olive oil. Set aside.

To Make Pizza:
At this point, you can either cut the dough into four separate pieces and make 4 individual pizzas or use the whole dough for one large pizza. The cooking time will stay the same regardless, so this is totally up to you. If making one large pizza, then gently stretch out the dough with a rolling pin or your hands until it reaches the size of your pizza stone or baking sheet. Remember, pizza doesn't have to always be round! If you don't have a pizza stone, then use a baking sheet and just make a rectangular pizza instead of a round one. If making individual pizzas, apply the same logic. Whatever shape and size you decide on, the pizza should be around 1/4 inch thick and I like to leave a slightly thicker border around to help keep all the toppings on the pizza instead of spilling over the sides during cooking.

Once you've achieved your pizza or pizzas, then spoon desired amount of pesto on top and spread evenly. Remember that pesto has considerably more olive oil than marinara, so although you do want enough to taste, be careful not to put too much which will yield a soggy pizza. After you've spread the pesto, then sprinkle on the chicken pieces, sun-dried tomatoes and asparagus, minced garlic, and dot around with the mozzarella. I like to give the pizzas a small drizzle of good quality extra virgin olive oil on top and then bake in oven for 15-20 minutes, depending on oven and desired crispiness.

When done, take the pizzas out and let stand 3 minutes so the cheese can set. Then cut into pieces and serve immediately!


My Notes:
If using a baking sheet, then line first with parchment paper for easy removal. Otherwise, any cheese that melts over will get stuck and it's hard to clean the baking sheet unless you do it immediately.

These are just toppings our family enjoys. You can substitute the asparagus with broccoli, zucchini, or any green vegetable! The pizza can be just as delicious with shrimp instead of chicken. Don't like onions or garlic? Omit it! If you have some wonderful in-season cherry tomatoes, feel free to substitute them instead of the sun-dried ones. Just be sure to cut them in half and give a quick pat with paper towel to remove some of the moisture so you don't have a soggy pizza.

The toppings can be made in advance, but don't roll out the pizza dough until before you're ready to cook it -- otherwise it will get tough and not be as tasty.

Avocados and Easy Guacamole

Monday, October 26, 2009

One of my biggest pet peeves is when guacamole doesn't taste or resemble guacamole anymore. By definition, it is supposed to be mashed avocados, lightly seasoned or enhanced. The avocado taste and texture should never be compromised in my opinion. When you're adding onions and tomatoes and cilantro and garlic and lime juice and spices, I think you're on your way to making a lovely salad. But it's not guacamole. Sorry.

I make 2 main kinds of guacamole. One is smokier and has a deeper flavor because I use cumin and oregano. The other is a very simple version that really lets an in-season ripe avocado shine.

This is my Easy Guacamole recipe.

The most important thing you can do is find good ripe avocados! I always (and I mean always) use the Haas avocados. They are smaller with dark green skins that turn a deep purple when overly ripe:

Notice how in the above picture, the skin of the avocado is dark green. It's not bright green, not purple. But a lovely shade of dark green. That's what you want.

Some markets will offer larger avocados. You might be tempted to get those thinking you're getting more value for your buck. And I suppose you are, but you are definitely sacrificing flavor. They have little to no actual avocado flavor and end up being a total waste of your money.

Telling an avocado is ripe is also important for a good guacamole. You don't want it too ripe or else it tastes old and gives an overall funky almost yeasty smell and taste. It's not pleasant. You also don't want it under ripe because then you won't be able to mash it to get that perfect creamy consistency.

So how can you tell if this avocado is ready to be glorified? Here's my list:

Color
The avocado needs to be dark green. Bright green means it's under ripe. Dark purple means it's overripe. You want it dark green for the optimal guacamole avocado.

Feel
I never, ever squeeze fruit or vegetables. All it does is bruises an otherwise perfect ingredient. Instead, I smell them. If it smells like a tomato or peach, then by God it's a tomato or peach ready to be eaten! But unfortunately you can't really do that with avocados. The color will give you a great indication of how far along the avocado is on the ripeness spectrum. But I've found I still need to give a gentle squeeze. And I do mean gentle squeeze. Hold the avocado in your hand, and using your pinky finger (because it's the weakest), see if you can press into the avocado and if the avocado gives a little. Don't press hard - you don't want to puncture it! If it's rock hard, it's under ripe. If it's almost like clay, then it's overripe. You want the give to be just enough so that you can squeeze it with your pinky finger. If you can't with your pinky but can with your thumb, then it's a perfect stage to use cut into chunks in a salad. But remember, you want the avocado a little riper for guacamole.

Smell
Avocados don't really "smell." They don't have an identifiable fragrance as does say a peach or strawberry or pineapple. But, when the avocado is past it's peak, it will give off an unpleasant smell. This is the oxidation that's going on inside of avocado - the flesh is starting to rot away around the pit and move out towards the skin. Almost always the avocado is also at a purple color stage and also very soft, but not always. It may still appear dark green and have enough "push back" so it can fool you. But if you smell something funky, that means it's been bruised in some way and air has gotten in and is rotting it from inside out. You don't want to pay the "2 for $3" and go home to find you can't make guacamole because the avocado is rotting inside. So give it a whiff before you leave. You want to smell nothing.

Like most recipes, a dish is only as good as its ingredients. Do take the time to check out and carefully select your avocados before making guacamole. I promise you, it will make all the difference in the world. And never use any part of the avocado if it is bruised or oxidized in any way; even though it may look fine to eat, that peculiar taste and smell has permiated throughout the entire avocado and will ruin your dish.

Now that you know how to select the perfect avocado, let's make something with it!

Here's my recipe for Easy Guacamole. The most important part is selecting the best avocados, so if you can do that, then you're 90% on your way.

Easy Guacamole
4-5 ripe Haas avocados
1 garlic clove, peeled and finely minced
2 limes, juiced
kosher salt
freshly ground black pepper

Cut each avocado in half and remove the pit. Using a spoon, trace around the skin of the avocado and scoop out the flesh into a bowl. Do not worry about getting it all out in one perfect piece; in fact, scoop it out in 3 or 4 pieces! Using a spoon or fork, gently mash the avocado against the side of the bowl, starting from the middle and pulling your fork or spoon to the sides of the bowl. Do not overmash into a puree, but do it enough to make a nice smooth and chunky consistency. Add the garlic and lime juice. Sprinkle with salt to taste and black pepper. Mix and serve immediately.

Trick: to avoid browning of the guacamole, leave one of the avocado pits inside.

Serving suggestion: I love serving it with blue corn tortilla chips. I think it looks nice together and the blue corn gives a smoother flavor. Also can be used on burgers, sandwiches, etc.

Cranberry Pineapple Salsa

For Trajan's birthday party I also wanted to do a seasonal salsa. Considering tomatoes are now out of season, when I saw this recipe in Gourmet that used fall flavors and colors, I jumped at the chance to try it out. Although when I do it again I'll add some changes, enough people liked it and wanted the recipe, so here you go!

Cranberry Pineapple Salsa
1 pineapple, peeled, cored and cut into 1/2 inch pieces
1 medium onion, chopped
1 Tbsp vegetable oil
1 (12 oz bag) fresh cranberries (not frozen!)
1/3 cup packed dark brown sugar
1/4 cup Seville orange juice (or 2 Tbsp each of fresh lime and regular orange juice)
1 cup packed cilantro sprigs, coarsely chopped

Preheat oven to 450 degrees with rack in upper third.

Toss pineapple and onion with oil and 1/2 tsp salt in a large sheet pan and roast, stirring occasionally until charred in spots, about 40 minutes to an hour.

Meanwhile, pulse the cranberries in a food processor until coarsely chopped. Transfer to a large bowl and stir in 1/3 cup brown sugar.

Add hot roasted pineapple mixture stirring until sugar has dissolved, then stir in citrus juice. Season with brown sugar and salt. Cool, then stir in cilantro. Let stand covered 1 hour.


My Notes:
I grilled the pineapple and found that to be an easier and less messy way to achieve the desired charred and caramelized effect. If you grill the pineapple, do not core it; just slice it into 1 inch thick slices and brush with vegetable oil. Grill on high heat until char marks. Let cool slightly before cutting (make sure you cut out that core!!)

I also used raw onions, but did not like how intense the flavor was. I definitely will do this again with oven-roasted or grilled onions.

The cranberries I thought were an awesome addition of sour to this salsa. I loved the color, the texture, and the flavor they gave to the whole dish. I liked how they played against the caramelized pineapple. Just make sure you don't pulse them too much; you want a rough chop, not a fine mince!

Clementine Jicama Salad

For Trajan's birthday party, I decided to do southwestern flavors because that's his favorite. A few of you loved the recipes, so I'm sharing via the blog of course. This one is a great fall salad that offers the crisp, light flavors you usually crave during summer months. I love it because it's a welcomed departure from the usual suspects of fall (apples, cinnamon, squash). I snagged this recipe from Gourmet magazine's Thanksgiving issue of last year (2008).

Clementine Jicama Salad
1/2 tsp chopped garlic
1/4 cup fresh lime juice
6 Tbsp olive oil
1/2 tsp sugar
8 clementines, peeled and cut crosswise into 1/4 inch thick slices
1 lb jicama, peeled and cut into 1/4 inch thick matchsticks
1 small red onion, thinly sliced
3/4 cup packed cilantro sprigs
1/2 cup crumbled queso fresco or mild feta
1/3 cup raw green (hulled) pumpkin seeds, toasted

Mince and mash garlic to a paste with 1/2 tsp salt, then whisk together with lime juice, oil, sugar and 1/2 tsp pepper in a large bowl.

Just before serving, add clementines, jicama, onion and cilantro and gently toss. Season with salt. Sprinkle with cheese and pumpkin seeds.


My Notes:
Clementines are a late-fall/winter fruit, so if you're doing this recipe in September or October, you're not going to find clementines. You can substitute oranges (Valencia oragnes are my favorite because they're sweeter) or even a can of drained mandarin oranges. If using the Valencia oranges (or any orange for that matter), cut back on the lime juice by half and do a full tsp of sugar in order to balance out the sweetness to tartness. Clementines themselves are very sweet and have a lovely honey taste to them, so make sure you taste your oranges before hand to gage how sweet or sour they are and balance out with sugar (or honey!) accordingly.

I used honey instead of sugar when I made this recipe. Since I couldn't find clementines, I used Valencia oranges and added a tablespoon of orange honey to the vinaigrette to balance out that sweetness.

The recipe calls to leave the cilantro sprigs on the stem and leaves whole. If you love cilantro (which I personally do), then do that. If not, or if making for guests, then take the cilantro off the stems and give a rough chop so the flavor isn't as intense.

I made the components of the salad (jicama, oranges, cilantro and onion) a head of time and stored in a bowl in the fridge for 5 hours before, and made the vinaigrette seperately. Then I tossed it all together and garnished before serving. This is a great recipe for a party or Make Ahead.

The queso fresco should be grated if using, and if using feta, then crumble it with your fingers.

A Return To Serious Food Blogging

A lot of my blogging time is spent on my other blog, A Mishy's Perspective. I promise now that a few things have settled down, I will post more on this food blog and recipe share. I'm also happy to report great positive feedback from people who've checked out this blog, so if you have friends and family that are into food and cooking, please do forward it on to them! My hopes is to build a cooking community where we can all share recipes, learn few things about food, different cultures and celebrations, and just have fun!

Eventually I am going to create a whole independent website for Enchanted Spoon so people can buy the new cookbook. In case you haven't heard, my friend Chandra and I are writing a cookbook on seasonal entertaining -- using seasonal ingredients to create wonderful menus to celebrate holidays, feasts, and the wonders each season have to give us. We're in the "testing recipes" stage now, and hope to have the book out next summer.

Until then, I plan to update this blog more frequently, so check often and pass on the word! And comments and advice on what you'd like to see more of, less of, what topics you'd like discussed or questions answered are always welcome!!

Best Chocolate Cake Ever!

For Trajan's 1st Birthday party this past weekend, I used Ina Garten's recipe for Beatty's Chocolate Cake and it was a huge hit. I got so many people asking for the recipe, that I decided to just post it on my blog. So enjoy!

For the Cake:
Butter, for greasing the pans
1 3/4 cups all-purpose flour, plus more for pans
2 cups sugar
3/4 cups good cocoa powder
2 teaspoons baking soda
1 teaspoon baking powder
1 teaspoon kosher salt
1 cup buttermilk, shaken
1/2 cup vegetable oil
2 extra-large eggs, at room temperature
1 teaspoon pure vanilla extract
1 cup freshly brewed hot coffee

Directions:

Preheat the oven to 350 degrees F.

Butter 2 (8-inch) round cake pans. Line with parchment paper, then butter and flour the pans.

Sift the flour, sugar, cocoa, baking soda, baking powder, and salt into the bowl of an electric mixer fitted with a paddle attachment and mix on low speed until combined. In another bowl, combine the buttermilk, oil, eggs, and vanilla. With the mixer on low speed, slowly add the wet ingredients to the dry. With mixer still on low, add the coffee and stir just to combine, scraping the bottom of the bowl with a rubber spatula. Pour the batter into the prepared pans and bake for 35 to 40 minutes, until a cake tester comes out clean. Cool in the pans for 30 minutes, then turn them out onto a cooling rack and cool completely.

Place 1 layer, flat side up, on a flat plate or cake pedestal. With a knife or offset spatula, spread the top with frosting. Place the second layer on top, rounded side up, and spread the frosting evenly on the top and sides of the cake.

Chocolate Frosting:
6 ounces good semisweet chocolate (recommended: Callebaut)
1/2 pound (2 sticks) unsalted butter, at room temperature
1 extra-large egg yolk, at room temperature
1 teaspoon pure vanilla extract
1 1/4 cups sifted confectioners' sugar
1 tablespoon instant coffee powder

Chop the chocolate and place it in a heat-proof bowl set over a pan of simmering water. Stir until just melted and set aside until cooled to room temperature.

In the bowl of an electric mixer fitted with a paddle attachment, beat the butter on medium-high speed until light yellow and fluffy, about 3 minutes. Add the egg yolk and vanilla and continue beating for 3 minutes. Turn the mixer to low, gradually add the confectioners' sugar, then beat at medium speed, scraping down the bowl as necessary, until smooth and creamy. Dissolve the coffee powder in 2 teaspoons of the hottest tap water. On low speed, add the chocolate and coffee to the butter mixture and mix until blended. Don't whip! Spread immediately on the cooled cake.


My notes: I can't find Callebaut chocolate so I use Ghirardelli semi-sweet chocolate chips and Hershey's unsweetened cocoat powder. Make sure you are using unprocessed cocoa powder and not granulated chocolate (Ghiradelli makes this and it's wonderful for hot cocoa but not for baking!). Teh granulated chocolate will give a sandy texture and taste to your frosting and cake, which is not pleasant.

Kid Tested, Toddler Approved: Child Proof Meatloaf!

Thursday, October 8, 2009

For some reason, my daughter Ecaterina does not like ground anything. This means no burgers, no chili, no sloppy joes or lettuce cups. And this presents a bit of a problem considering meatloaf is one of the most mommy-friendly dinners to prepare.

I grew up a kid of immigrant parents. That means we never had meatloaf. My grandma made once something like meatloaf, but it had boiled eggs in it and was...weird. I never really had meatloaf before until I was an adult, and curiosity peeked, I tried making it myself! Well, predictably, it was dry and bland and I could see why my parents never jumped on the meatloaf bandwagon. But then I had it a few years later at a restaurant and it was moist and flavorful and delicious. Curiosity peeked again.

I've been tinkering with a few recipes for "meatloaf" using beef, turkey and chicken respectively, various spice blends and toppings to come up with an interesting yet traditional recipe that I can make for the whole family on a busy weekday. And finally last night -- SUCCESS! Even Ecaterina ate a big portion with no complaint.

I proudly give you:

Italian Style Turkey Meatloaf:

1 pound ground turkey
1 small white onion, diced small
1 Tbsp extra virgin olive oil
1/3 cup chicken broth
2 medium (or 1 extra large) egg, lightly beaten
2 large garlic cloves, minced
2 Tbsp sun-dried tomatoes in oil, roughly chopped
1 tsp fresh parsley, chopped
1 tsp fresh basil, chopped
1 tsp dried oregano
1 Tbsp Worcester sauce
1 Tbsp ketchup
2 Tbsp - 4 Tbsp Italian style dried breadcrumbs
kosher salt
freshly ground black pepper

For the topping:
1 cup ketchup
1 tsp Dijon mustard
2 heaping tsp brown sugar
1 Tbsp good balsamic vinegar

Preheat oven to 375 degrees.

Heat the olive oil in a saute pan, and saute the onions on medium heat until soft and translucent, about 10 minutes. When the onions are translucent, add the chicken stock and simmer until the liquid absorbs into the onions, creating like a saucy relish consistency. Remove from heat and allow to cool slightly.

While the onions cool, place room temperature ground turkey (having it room temperature will allow it to mix better) in a large mixing bowl. Add a good pinch of salt (about 1/2 tsp - 1 tsp) and some black pepper to taste (I like about 1/4 tsp when making for kids). Add the eggs, garlic, sun-dried tomatoes, parsley, basil, dried oregano, Worcester sauce, 1 Tbsp of ketchup and 2 Tbsp of the bread crumbs to start (you will add as needed, depending on how "wet" the onions are). Add the cooled onion mixture to the turkey and using your hands, mix well making sure to incorporate all the ingredients and distribute the egg evenly. But don't over mix! Mix just until all the ingredients come together.

Take a small amount of the mixture and try to form a ball like for a meatball. If the mixture feels too wet and cannot come together into a ball, but instead falls apart easily, you need to add more breadcrumbs. Add 1 Tbsp at a time until you get a wet and very moist consistency, but one that can just hold a form. If you make a mistake and add too much breadcrumbs and the mixture is dry and tough, add more chicken broth (cold) to the mixture until you get the right consistency. But truly, 2 Tbsp of dried breadcrumbs with maybe a pinch more should be just right.

Place the meat mixture into a loaf pan (no need to butter or spray) and spread out evenly on the top. Set aside. (At this point, if you plan to bake it later, cover with aluminum foil and refrigerate until ready to bake)

To make the topping, mix together the ketchup, mustard, brown sugar and balsamic vinegar in a small bowl. Spread evenly on top of the meatloaf mixture in the baking pan and then bake in oven for 45 minutes to an hour.

Start checking the meatloaf about 45 minutes into it. When the edges of the pan begin to caramelize (don't worry if it burns even just a little...that's the sugars of the topping caramelizing) and when you shake the pan and the meat doesn't giggle but instead stays firm, then you know it's ready.

Remove and let cool 5 minutes before slicing.

Serve with garlic-rosemary oven roasted potatoes and steamed broccolini.